Sunday, July 29, 2007

Addicted

Did I tell you that sewing lingerie is an addiction? It is for me, and on the lingerie sewing classes I have had most women did have the same feeling. A lot of them stopped sewing clothes, but were sewing lingerie all the time. As you can see from my blog the last is not the case with me, I do sew a lot of other things, and I can say now that more then half of my wardrobe is made by myself.

So I'm addicted to sewing in general, but have to give up for a few weeks, as holidays are starting and there will be no space in our car for my sewing machine. Time to read, walk, swim, visit local markets and do all other holiday things.

To part a few pictures from the lingerie sets I made in between the last weeks (which answers Carolyn's question just posted whether I'll make more). The first bra is the one I used for my tutorial on making bra's, the other is from another made to measure pattern.
Both panties are really old TNT patterns, also drafted to my own measurements on a lingerie course. These I made yesterday and today, really easy to make your own, matching a bra.

Bye for now, will be back end of August.


Friday, July 27, 2007

Sewy bra Rebecca finished

The Rebecca bra is (as good as finished), and the fit is great. I'm amazed, as for the Linda bra I made earlier I had to change so much when making it a second time. But this one is right the first time!
It's not perfect with the folds it has. As mentioned in my review on PR too, I believe this is caused by the lycra I used, which has a lot of stretch.


A few details on construction:

Measuring the elastic: I used 20% decrease on the length of the elastic, because of the stretch of my lycra, and prior experience/preference. The pattern mentioned 5% or 10%. In the picture below you can see that I write the original seam length, the percentage decrease and the final elastic length on the pattern. Easy for using again.


Side panel: there is a seam in the side panel, This seam could easily be used to add boning, to give the bra extra strength. You see this in RTW bra's, but it is not included in the instructions for this bra.


Shoulder straps
: the instructions add the shoulderstraps early in the construction process. This could surely be done, but I did it my way, and it was the last thing I did.
I sewed the shoulder strap to the cup with a straigh stitch (right sides together), then opened the seam and topstitched on both sides.

Wednesday, July 25, 2007

Another bra

I'm trying the new Sewy bra pattern at the moment and am very impressed by the way this bra is finished on the inside, working along the instructions given. Of course I do change a few things here and there, but the instructions are overall very clear. The only mindor dislike is that you see a partially stitched seam in the illustration, where they mean that the whole seam must be sewn. This was a bit confusing at first, but now it's clear, no problem any more.

This pattern is designed especially for non-stretch fabrics and for the larger cup sizes (if I remember well there are 4 size-groups to choose from, and my D75 is in the first group). The cups are therefore interfaced. You sew the cup-parts in 3 layers on each other, folding them back gives a very neat finishing on the inside. This you can see in the last picture.

The instructions tell you to do the following in two steps, stitching twice. I did it in one go.

The lower cup facing is pinned to the wrong side of the upper cup, then you pin the right side of the lower cup to the right side of the upper cup and stitch the seam.
Then trim the seam allowance, fold facing and lower cup together and topstitch.


These are pictures from the outside and the inside of the cups.


Sunday, July 22, 2007

Done a lot

Pff, that was a weekend of sewing a lot. An appointment with friends to go away on a boat today was postponed to next weekend, because of the bad weather. Some excuse for sewing. I got a lot of things done. First finished my Burda blouse, the review is on PR.
Then I finished the other Burda top that was waiting on the return of my serger, made changes to pants for my sister (who can not sew), made a modesty panel to the top of DD after all, and sewed together with DD a very easy knit dress from the latest Knip Mode. It's black and difficult to take pictures of, and she is not in a photographing mood, so no pictures.


Then finally I made in two hours the new Jalie twist top. Great pattern! A review is here. In the review I've included the changes I made for a D-cup. I'll make a post on that later here in

Thursday, July 19, 2007

Burda 08-2005-119

Yesterday I called myself to a halt. All those new patterns were in my head (do you have that too when you buy new patterns?), and I wanted to start right away with new patterns and fabrics. But there are a few unfinished projects and I really must finish these first, because otherwise they will be either unfinished or hang around my sewing room for too long, so that I'm bored by the pattern/fabric before I get a chance to wear it.

One of the projects to finish is the striped blouse. This is Burda pattern 08-2005-119.


In the magazine picture it seems very low cut, but tissue fitting the front made me think it was ok. Yesterday evening I finished the front and back, and though it is not very high, it is fine with me. Tonight I'll be going to my sewing class, making a swimsuit, so hope to finish this project this weekend.

Tuesday, July 17, 2007

Patterns

I have quite a few new patterns that I have bougt the last week from various sources:
  1. Ottobre Woman magazines 2006 and 2007, mainly because of the great t-shirts that were reviewed on PR by Sew-4-fun and Debbie Cook.
  2. Jalie 2788, the twist top. Want to make this one work with FBA. Difficult I guess, but must be possible.
  3. McCall's 5142, jeans. This was the pattern advised for the online jeans class on PR. I decided to try this pattern first, and will take the class later if needed. Never made jeans for myself, and want to give it a try.
  4. The Marfy pattern that I wrote about earlier this week
  5. Last: the Sewy Rebecca pattern, a bra pattern for non-stretch lace.
A lot of these will be projects for fall, which to me now sounds far away, but July is already halfway, and in August I'll be on holiday. And as I wrote earlier, my sewing time is a bit restricted at the moment.

But: I traced the Rebecca pattern last night. I think it is a great pattern for the bigger sizes. It is designed for a non stretch lace, and reading the (German) instructions it says that the cups can be made completely of non-stretch fabric.
The pattern is a bit difficult to trace, as it comes on red paper. Obviously because of copyright reasons, but it makes it difficult to see the right size in the many lines.

After some irritation on this point, I decided to copy the pattern, draw the pattern pieces I need with a colored crayon and then trace on pattern paper. This worked great.

The width of the side panel is determined by the width of the shoulderstraps. Instructions are included how to adapt the pattern for this. In the picture I changed the upper cup accordingly.

After tracing the pattern pieces I added my default 1 cm seam allowances. And now it's ready to cut from fabric.


Monday, July 16, 2007

Shorts likely to be a wadder


I'm not very lucky making my holiday shorts. Yesterday evening I wanted to make the most part of it, but got stuck in zipper closing.


First I made the fly-front zipper with the Sandra Betzina method, which is very easy. But after topstitching, I saw that the facing was not wide enough, thus the facing was not stitched. Did not check that obviously. And I already had stitched a part of the pocket lining when I sewed a zigzag stitch at the bottom of the topstitching. I just cut it out, this is not a high profile project anyway. No one will see the clip in the pocket seam :-).

But then the construction for the facing waistband . I confess that I thougth that it would be clear how to do this when I was ready for it, as the Burda instructions are totally incomprehensible here. But I got stuck. Just don't understand how it should be constructed.

No luck with these shorts. As this is only a cheap piece of fabric from my stash, I'll find another pattern and throw away this one.
I guess it says something that I did not find a review for these pants/shorts on PR.

Saturday, July 14, 2007

Old magazines

Reorganizing a few bookshelves today I found a couple of old fashion pattern magazines. I certainly knew that I had a few left, but they were not very near. Some are from the 60's, very small and mostly black and white, a few Burda's and Neue Mode from the early 70's. These must have belonged to my mother or grandmother, as I am from 1961 and did not buy those magazines. From the 80's I have Burda's and Knip Mode magazines, from which I remember a few patterns that I made.

Let me share a few pictures:

From the sixties


From the seventies (doesn't that halter dress look familiar?)


Wednesday, July 11, 2007

Marfy and Knip

Not much sewing going on at the moment, sometimes I have an odd 15 minutes in the evening. DD has vacation already, while my son is still in school and will be free next week. Children around the house during daytime, in my case means that my work is usually not finished, so I'm finishing work in the evenings. But most of my work is completed, so I hope to find some sewing time again soon.


When shopping with my daughter, we saw the new Knip Mode for August (!), which I do not always buy, because the patterns fit her better than me. This month features dress patterns inspired by celebrity dresses, and being 13 my daughter made me buy it, because she wants at least 1 of those dresses. I'm lucky to have a daughter that still wants to wear home made clothes occasionally. Lucky too because the patterns are simple.

Not simple is the Marfy pattern I ordered with a Dutch internetshop for patterns. It was on sale (at least a bit cheaper) and it is the winter coat I liked so much in their catalogue last year. I'll store the pattern for somewhere in October, and it will be my first Marfy pattern ever!

Anyone suggestions for the fabric to use for the collar and sleeve?

Sunday, July 8, 2007

Stripes :-) or :-(

My serger is not yet repaired, pity, as there are some things I want to finish. And I'm so used to sew or finish clothes with my serger, that I'll wait till it is back.

And as it is more like autumn here in Europe than summer (fierce storms, flooding because of continuous rain and a temperature that makes you think winter is coming), I started with a blouse with long sleeves! It is a beautiful quality cotton with stripes bought online from a German store, Exclusive Stoffe. I certainly like these stripes, but as I'm a bit (too?) precise about cutting stripes, it took me a long time to cut it.

First issue: the stripes are not symmetrical. The pattern did not require pattern pieces on the fold, so I cut the fabric in half, turned and layed them so that the pattern pieces will be symmetrical (just because I liked to, really not necessary).

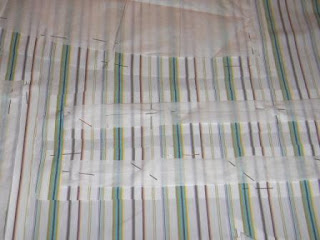
Second issue: you can not cut the fabric in two layers at once, if you want the stripes to match. I more or less laid the fabric with the same stripes on each other, but know that this never workes over 2 meters of fabric.
I cut the first fabric layer, then re-pin all pattern pieces so that the stripes match and cut the second layer of fabric. It is the moment that I'm always thinking that I should stick to plain fabric, flowers or anything not requiring matching fabric. But I'm uncurable, more stripes in the stash for this autumn!

Now all pattern pieces have to be marked, which again takes extra time with securing the stripes. I'll do that tomorrow, using copier papier as described in an earlier post.
Below two pictures of the process: 1. after cutting the first layer, 2.

Thursday, July 5, 2007

Bra pattern

Today I've ordered a new bra pattern: Sewy Rebecca. It is especcially designed for non-stretch lace. Further it has a side panel that I like, because it gives me the opportunity to interface that part separately with a stronger fabric.
In an earlier post I commented on the wire-construction of the Linda-bra. Seeing this picture I assume that the wire construction is the way I like it, folded from the cup downwards to the band.

On Pattern Review a sew-along on lingerie has started and I joined this. I make lingerie without a sew-along too (as you can se from previous posts :-), but like very much to hear what others make and share experiences.

Tuesday, July 3, 2007

Top finished, serger broke down

Today I got my long invisible zipper and finished the top. I liked it so much that I started another right away, with fabric that remained from my wrap top. So now I have two tops, both from "Gorgeous Fabrics". Together with two other fabrics I ordered and will sew up hopefully after the holiday season, they were worth the extra cost involved in shipping.

The other top will have to wait, my serger was giving so many problems that I took it back to the store that repaired it in January. They will look at it, but it will take about a week before I'll have it back. :-(

Therefore only a picture of the partly pinned top.

Monday, July 2, 2007

Burda top, FBA

The Burda top I'm making (03-2007-103) was designed for a B-cup. On Pattern Review I read that it needed alteration if you had a larger cup, which did not surprise me. I have a D-cup, so I changed the pattern. As pictures say more than words, and I like to share this information with you, here is what I did. For the pivot and slide method I used the book Fitting Finess from Nancy Zieman, which I find a very helpful book.

1. Add length to the upper part of the pattern, making a 90 degree line to the straight of grain line, cut the pattern and add the extra length (I used 4cm).
The amount needed I measured by comparing the pattern piece to my actual length from shoulder to under my breast.
Don't forget to make this change to the back pattern part and the front band.

This lengthening of the pattern is needed to make sure that the band goes below the breast, and not ends up on your breast.


2. Mark the amount to widen the top in the front, in my case I thought 2 cm would be enough (which of course makes a total of 4 cm extra width in the end).

3. Pivot from top to the marked point. Draw a new line from pivot point to marked point.


4. The marked point to widen the top is used as second pivot point. Pivot the pattern to the seam line. Mark the line.

The pattern is now changed, armhole and sideseam have not changed, but extra width is added.