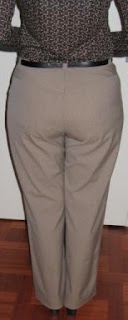
It seems that I finally made the right changes to the back of the pants pattern. See the left leg on the picture. AND see all ripped stitches. Never used my seam ripper so much as this week.
The solution in the end for me is basically this:
1. Add more body space by taking space away from the center of the back pattern (see my first post on pants fitting) and adding the removed space to the side seam
2. Make the crotch a bit deeper
3. Lengthen the back crotch line a little in the waist (in my first pair of pants I already added 1 cm, now I added 1 cm more. This last point has nothing to do with the wrinkles, but with appropriate moving space and being comfortable)
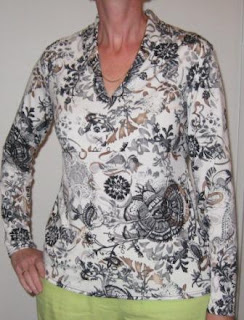
In the picture on the right you can see the changes, the black line is the line that was used on the pants on the left. The seam ripper was not intentionally photographed, but it shows how near it was to me.
So in the end no fish eye dart or diagonal wedges for me. Though the site of Debbie was very helpful in understanding the problems.


I'm very happy I have found the solution, but the downside now is that I look very critical at my other pants. The black one, of which I not yet published a picture as they were unclear, I now see with different eyes, and I don't like what I see. Like with learning to do a FBA earlier this year, this knowledge of changing a pants pattern will change my sewing of them. And hopefully take the fitting issues at a higher level for me.
Vogue 2987
In between the changes on the pants I made the preparations for my Vogue jacket, that I want to use in the Timmel swap. I'm still not sure I will definitely enter this swap, but thanks to an answer of Carolyn to my post on my doubts for this jacket, I see the jacket more as a challenge then a problem. Thanks Carolyn.
Pattern and changes
- Traced a size 12, tapering down to 16 at hip height
- Lengthened 5 cm (2 inch) at the waist and 2,5 cm (1 inch) at the sleeve
- Did a FBA to add bust-space
The fabric I bought for this jacket looks a bit like suede, but after I washed it, it was not stiff enough for the jacket. I decided to underline it with a fabric that I bought some time ago at an online shop here in the Netherlands. When it arrived it was a huge disappointment, as it looked so different from what I had expected. Not something for me at all. But now I can use it.
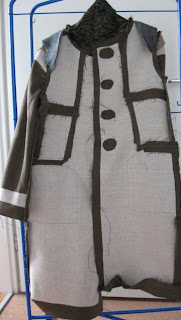
For the front I used fusible interfacing, and left the darts free. But the darts are stitched to the underlining, to make sure I can more easily sew the dart later on.
There are 18 pieces to this pattern, of which 14 had to be underlined, this meant 28 pieces to underline! So I did this a few at a time, and now I'm ready to go on.
But my sewing spirit is very low at once, so I'll take a break for a few days. A lot of business work to do (not to speak of the huge amount of ironing and other house related things).


Answer
It was nice to have so many positive comments on my bra. Thank you all. Let me answer the questions:
1. I did not use a commercial pattern. This bra was basically drafted from the other bra pattern I use for myself now for two/three years.
2. No foam was used, but I used a double layer of lycra for the all black undercup. This lycra btw is the same color black as the lace, but it's different in the picture.
3. Fabric used: black lycra and non-stretch lace
If you have more questions on lingerie making, please feel free to ask. I'll be glad to help if I can (but remember, I'm not a professional, just someone with experience in lingerie making.)
Have a good week all, I'll not be blogging for a couple of days.


