I love to share my projects. It's mainly sewing projects and a bit of knitting too.
Friday, June 20, 2025
Vogue 9006
Monday, June 9, 2025
Quick sew
Do you sew something easy after a more complex or time consuming project? I certainly do.
So Saturday I sewed a pretty simple top. With a pattern I have used before, though that must be around 15 years ago.
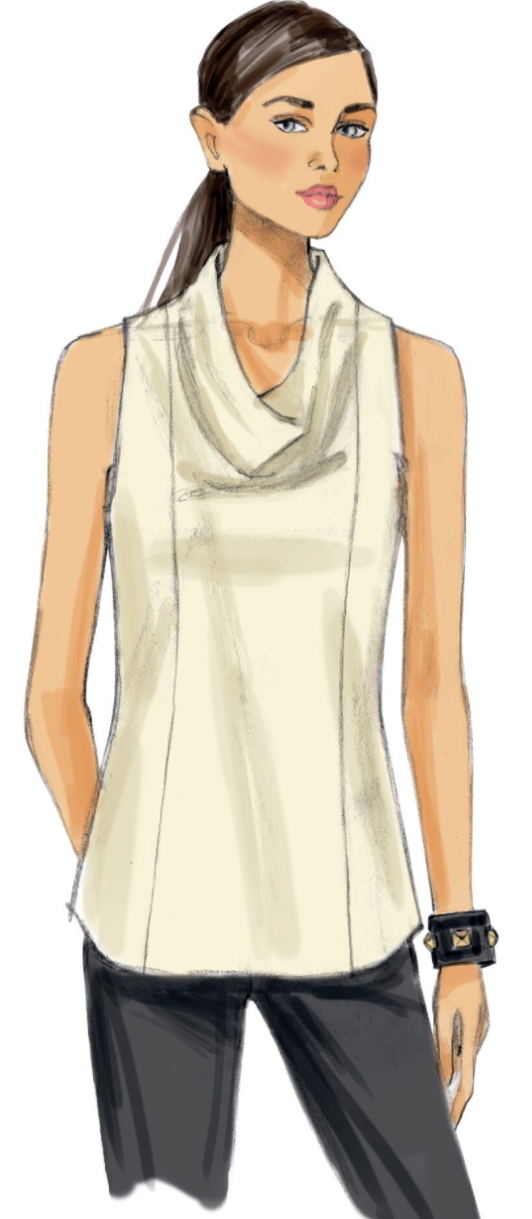
It’s Vogue 1519, a Kay Unger pattern for a top and skirt. You can’t see the details of the top in the envelop photo, you need the line drawing for it. The skirt is ‘just’ a wide skirt, nothing special about it, apart from the fabric used for the photo. The top is very nice:
Tuesday, August 27, 2019
Random projects
This post contains pictures of a few projects I made in the past months. I didn't take notes of any details, so present them with their line drawing and only minor details.
StyleArc - Sadie top
I've made this before and made a verwion for myself and one for my daughter (the striped version).

Vogue 8972, also a dress I made before in plain linen fabric. This time around I made it in a print, but as not to lose the design lines, I used piping at the waistline, the neckline and the armholes. Definitely a more formal dress. Made from cotton with a touch of lycra, very comfortable to wear. One of my favorites at the moment when I need a formal dress.
Wednesday, August 21, 2019
Vogue 1183 less formal


The only "problem": it's a more formal style and in my life I have only limited need for formal dresses.
At some point I was inspired to make this dress in denim and use topstitching in another color, as done on jeans. Unfortunately I didn't take notes on size used or changes made, I just have two pictures that I shared with my sewing friends on Whatsapp. I moved the center back zipper to the side and am certain that I took it in on the center back neckline, as I usually do. The waist is interfaced and has two layers of fabric to give it more stability.
It's a dress I loved to wear this summer. I did not line it and it was cool on a hot day. As you can see in the first picture the fabric was not very thick. For me a good combination of fabric and pattern.
Tuesday, July 17, 2018
Dress from souvenir fabric
It’s not often that I find a fabric store close to me when I’m on holiday. This year, when we drove into the village where we had rented accomodation for the second week, I noted a fabric shop when we entered the village. Of course I had to pay a visit to the store, being at walking distance. It’s a shop specialised in linen fabrics, garments and home decoration (cushions, tea towels) with the name Lin ou l’Autre (nice wordplay).
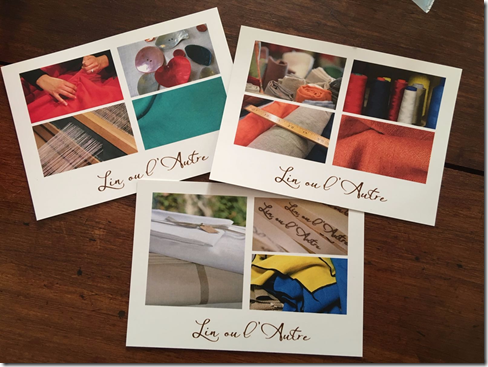
Two fabrics came home with me as souvenir fabric. Note the flax thread and the cute cards they have. I particularly like the one with the picture of taking a strand of thread out to make sure it’s straight! I’ve often done that.
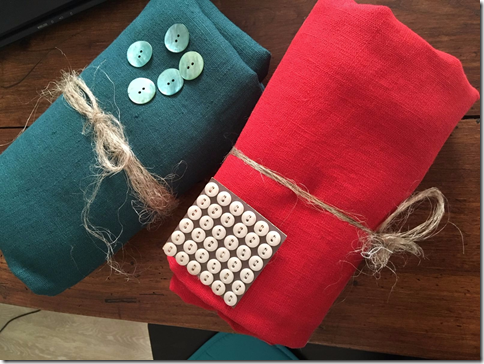
Both the colour in above picture and of the finished garment below are too bright. It’s really red, but not as fire-arms red as the pictures suggest.
I made a dress from one of the fabrics I bought, which is fast in my book, only been on the shelves for about 3 weeks!
The pattern I used is Vogue 8972, view B.
I made a muslin of the upper part because I didn’t want to take a risk with my good fabric. It has pattern pieces for different cup sizes. I used D-cup and that was fine. As always I had to lengthen the bodice, which I did at the indicated line, which was in the waistline pattern pieces. That certainly was wrong: the upper part ended too high, not covering the bust area, which made the waistline look silly. I added the extra space to the upper bodice pattern pieces and that was where it should have been in the pattern too. As you can see I add quite a bit (4 cm).
Unfortunately the photos don’t do the pattern justice. I really love this pattern and how it looks and feels on me. I think it’s a great pattern for hourglass figures.
The lining was sewn by machine. It was a bit of a puzzle. The instructions tell you to do quite a bit of hand sewing. More than necessary in my opinion. I know it’s not that difficult or time consuming, but I like to do it by machine if I can. In this case it’s extra complicated as you can’t leave the shoulder seams open till the last moment, which is one of the ways to do it. Not if there’s a cap sleeve of course.
It was a bit complicated and one day I might make photos and write it down properly. For now I will have to make do with some short notes I made myself too.
Monday, June 18, 2018
Inside of dress 1351
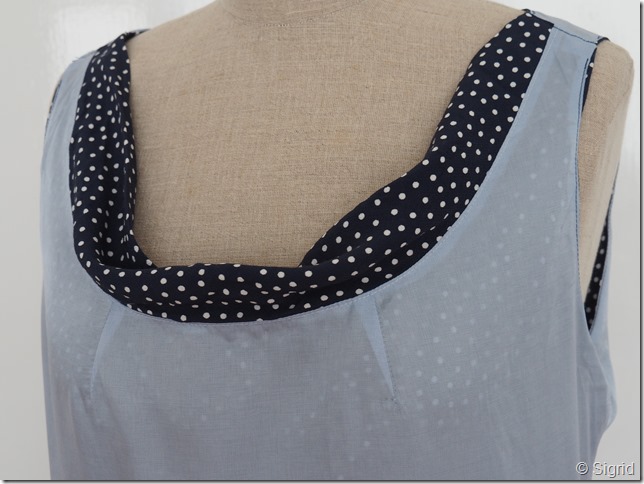
An update with a few photos of the inside of Vogue 1351. The lining has a deep neckline with darts, to which the cowl of the dress is sewn. No seam edges visible
I made sure the dress was folded a bit inward at the armholes and the edges were understitched as far as possible. The light blue was the only colour I had available and as you don’t see the lining from the right side, it works well.
The lining with the darts keep the dress close to the body. No unwanted exposure when moving in this dress.
I really love this pattern and am thinking of making another one soon.
PS: in my previous post I mentioned making a center back seam, that was not on this dress, but on another one.
Friday, June 15, 2018
Dress Vogue 1351
I first became aware of this dress a while ago when Carolyn (from Handmade by Carolyn) made a lovely version in navy and pink. She also mentioned that the lining of this dress was so beautifully drafted and the pattern thus has a neat finish on the inside. This got me intrigued. As it was OOP by then, I asked my friends whether they had a copy of this, but no one had. One of them found it soon after in a second hand shop and gave the pattern to me. YEAH!! (thanks again Sheila).
It’s an easy dress to make. I traced a size 16 for the body, compared that with my sloper and it was very close. I tapered to a larger size for the waist/hip area but trimmed that off later as it became shapeless. It indeed has a lovely finish on the inside, of which I now realise I haven’t taken photos yet.
As my fabric is a non-stretch fabric of unknown material I did sew in the side zipper, as indicated by the pattern. With the front and skirt being cut on the bias, the fabric made strange pleats around the zipper area. I interfaced the edge where the zipper was sewn, which probably added to the effect. End of story is I took out the zipper and don’t miss it. The other changes were lengthening the bodice by about 4-5 cm (default change for me), adding a center back seam to be able to make it less wide at the neckline and sewing the underarm with a very narrow seam allowance. The armhole was a bit too deep if I used the 1.5 cm seam allowance.
For a change there are photos of me wearing the dress outside. These pictures are taken in France, where we enjoyed a lovely holiday. Not perfectly ironed, not my priority on a holiday, my apologies ;).
On our way home tomorrow. Some sewing again next week probably.
Thursday, April 26, 2018
Jacket Vogue 1439
Over a month ago I showed this jacket in a nearly finished state. Took me two weeks to finish it for real and took another two weeks to get pictures. The fabric doesn’t behave very well in pictures but I’m happy with the spring vibe it has. Having worn one of my self drafted jackets today and seeing these pictures now I can see that this jacket is too wide in the shoulder area and could have been a little better fitting in general. Sometimes I just don’t want to do all the drafting, but for jackets I really should take the trouble of drafting or make a muslin. This time it was the collar part that I was unsure of and wanted to start and use a pattern. I’ll wear this, it’s just a little moaning amongst sewing friends that it could have been better.
The upper part of the back is too wide as well, the lower part is fitting well.
For those who have the pattern and might want to sew it: the pattern pieces and instructions for this were a little strange in my opinion. There’s a separate facing for the inside that extends further than the part that’s on the outside. It makes for a more difficult way of construction as also the lining then has a more difficult corner. I didn’t see the need to construct it like this and thought it would be enough if I just cut the outerpart as a facing too. Worked very well and was so much easier in sewing it together. I used the other front pattern pieces for the lining as well, and only used the separate back pattern piece.
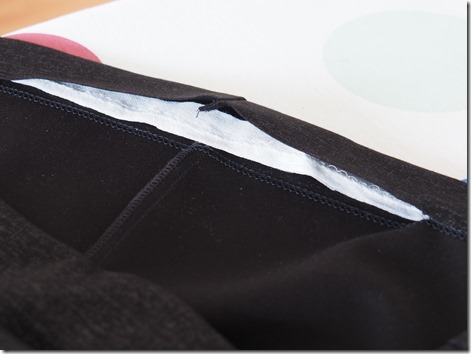
The pattern has a sleeve with a vent and buttons/buttonholes. I omitted those.
One caution on the collar: if you sew on autopilot, you can very easily sew the collar the wrong way! That’s what I did in any case. I did sew the two collar parts together as if it was a lapel collar and closed and trimmed the wrong side. I was lucky to have enough fabric to cut it again.
I’ve lengthened the body and sleeves significantly. 5 cm in the body, 3 cm in the sleeves (I like longer sleeves anyhow).
This pattern is out of print, but very current I think. I’ve seen this style of collar/neckline a lot in patterns recently.
Sunday, February 4, 2018
When you don’t do things as you advice
A while ago I wrote a post on hemming knits with a coverstitch, showing a way in which a row of basting thread helps you to stitch accurately. Definitely a method I recommend and I do it that way most of the time. Last week though I was a bit in a hurry to finish a dress and thought I could wing it. The reason I thought this was that the fabric was very stable, with no tendency to wrinkle or distort.
Well, it didn’t happen as I hoped. Most of it went right, but there was about 20 centimeters of a loose hem.
For the rest it was a nice hem and I didn’t feel like undoing the stitching (do you know that feeling that when you don’t want to unpick a coverstitch hem comes out very easily, when you want to unpick it takes forever?).
A piece of hemming tape was the solution. I cut away a bit of one side to make the stitching on the tape closer to my hem.
Ironed it and my hem was done, with great stitching on the front. Nobody will be the wiser seeing this dress.
The resulting dress, Vogue 8946, which I made more than 3 years ago in a print. It was a dress I loved to wear, but had reached the end of its life cycle. For this version I lowered the neckline a tiny bit and brought the shoulders a bit more in to the neckline. I made more photos but it’s ever so difficult to get good photos of this black fabric.
Wednesday, May 18, 2016
Knip mode top and Vogue pants
Black is always a very hard color to photograph. Seeing the pictures from yesterday on my blog in daylight, they even are more black than I saw them in artificial light.
Today a photo from me wearing the top, which always gives a better indication about fit and style than a dress-form photo. It helps I have a tripod and remote control now. Still need a bit of practice using that.
The colors are very much lightened so you can see the pleats of the neckline. This top has so many layers that I advice a very thin knit for it, otherwise you will have problems sewing the shoulder seams. This consists of 5 layers of fabric (double layer collar with gathers!, front, front facing and back shoulder). Knip mode is a magazine like BurdaStyle with sheets where you trace the pattern from. In this case very difficult as there are many lines for all the sizes included and two pattern pieces were in the same area as well. I think the pdf pattern would be useful in this case, instead of tracing it. Knip mode has extra instructions (in Dutch) on their website. Reading them the first time it seemed clear as mud, but when actually doing it with the pattern pieces it worked fine. For the (Dutch) readers: an asterix * is missing on the pattern that is referred to in the instructions, but if you got that far you’ll probably see how it’s done.
The trousers are Vogue 1417, for which I wrote a blog post on the great draft and instructions for the pockets. This pattern had some great design lines. Not so sure about the style on me, too narrow at ankle height.
Sunday, August 17, 2014
Glad I made a muslin
I’m in a mood for skirts, have sewn two recently (one not blogged about yet). Last year I bought Vogue 1389 for the skirt pattern. I like the jacket too, would only sew a real lapel collar but the skirt had a special appeal to me. Learning how to draft patterns does not mean I’m not using patterns any more, some are intriguing to learn about the way they are drafted. This pattern is one of those.
It has two main pattern pieces if you don’t count the facings and there is no side seam. That seam is drafted a bit more to the back . The upper part with the darts is a combined front/upper back pattern. Difficult to trace between sizes, therefor I took the size by hip measurement. I was inclined to use my fashion fabric (a teal linen) but decided to make a muslin first. Glad I did. Barely enough room at hip height but way too much fabric in the waist. I have no idea (yet) how to solve this. I might just take my skirt draft and make something similar. I just can’t do without a vertical line somewhere. I’ll keep the muslin and take it to class when it starts again in September, see what my teacher thinks.
On a side note: the instructions are pretty difficult as they have you sew the dart till halfway, then turn and fold and stitch the remaining half to the facing, which is attached prior to sewing the darts. No way I’m using a facing in a muslin phase, I’ve sewn all the darts from beginning to end which worked fine. When you read this and want to try this pattern using Vogue’s instructions, I would advise a muslin, as there is no way to alter at the waist later.