Monday, March 12, 2012

Last week of winter sewing

Spring is coming! The sun is shining here, also yesterday was a very sunny day. It makes me feel so much better. Looking in my closet it also means that I want new clothes in lighter colors. I've been preparing a few things this weekend. More about that later, I still have to finish (sew on buttons) a shirt and a pair of pants (trousers? confusing to me) in black/grey. Promised myself that is the last of the winter sewing I'll do for now.
The pants I'm working on are the StyleArc Chelsea pants. The StyleArc pants patterns get a lot of praise on the blogs and on Pattern Review. And I'm the next one. Not perfect right out of the envelope, but with my figure that is not what I expected anyhow. But the tweaking wasn't too bad. The muslin had a bit too much space in the back leg and of course the waist was too wide. The front was good from the start.
After removing the extra space the back still had too much wrinkles. After stitching the crotch line a bit deeper it was much better. The obligatory before/after shot:
Not perfect, but good enough for now. I'm not after the holy grail of pants fitting right now, but I need new clothes, not a search for the perfect pattern for a couple of months. I've cut enother pair from spring fabric!

Friday, March 9, 2012

Comments and spam

Thanks to JillyBe's post on the dreadful word verification Blogger has put up I did check and found out that the verification was still on, while I thought it was not. Appears that when you are logged in, you don't see this verification on your own blog. Well, I've changed that, and the verification should be gone.

Hoping it will not result in too many spam comments. Speaking of spam comments: now I was in the layout mode for my blog, I found that a number of comments were marked as spam which were not spam but just kind comments from my readers. I did not get a notification for those, so there were even some comments from almost a year ago that were in "quarantaine".
So sorry I didn't notice and your comment didn't come up on the blog. Like everyone in blogland I do like and appreciate every comment.

Thursday, March 8, 2012

Neckline

A special neckline always gets my attention, either in a pattern or in a (web)shop. This week I made quite a few screenshots of the new Claudia Sträter collection. A Dutch brand I like, mostly good quality fabrics and beautifully sewn as well. I own a vest (waistcoat?) that has a finishing that you hardly see in rtw. Their prices are reflecting the quality, so mostly I go there when there’s a sale. But snoop-shopping in the webshop is fun too.

I LOVE the neckline of this jacket (retail price 249 euro) and would like to copy it.

It’s that I promised myself to make a few spring basics first, otherwise I would be browsing my magazines now for a basic jacket to start with.

Monday, March 5, 2012

Making a sleeve slit in a shirt

Guess what my next project is? A blouse.  This time I’m making the sleeve slit that is more common in womens blouses/shirts. Which made me think to write this little tutorial. It is way is a little different from what I’ve learned to do, but I think it’s very easy.
For my Dutch readers: the same tutorial is available in Dutch here.
1. Basic pieces: the sleeve (in my pictures a piece of cotton that was near) and a rectangle 4 cm wide for the slit facing at least twice as long as the length of the slit. My piece is a bit longer because I find it easier to work that way.

2. Pin the sleeve on the facing, right sides together. The ends are matching, the middle corner is 0.5 cm from the edge. Fold the sleeve in a way that no real fold is made. 
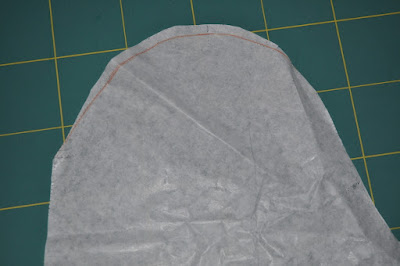
3. Stitch 0.5 cm from the edge. At the center the stitches just touch the fabric of the sleeve. 4. Press the seams towards the opening 5. Press a seam in the split facing 6. Fold and stitch-in-the-ditch from the right side of the sleeve.  This is hardly visible if you do it in matching thread. My black on white is only for these pictures ;) This is the way the inside looks now:
7. Stitch a diagonal line at the top of the facing. This will prevent stress on the weakest part of the construction.
 
8. Fold one side inwards (on the side of the widest part of the sleeve) and press. Ready! It doesn’t take long, but don’t forget to press in different stages for a neat result.

Saturday, March 3, 2012

Burda 03-2012-116

Pictures of the finished jacket. I love the style of this and might make another one. This time I made a jacket without making a muslin, because of starting it in a weekend with sewing friends and not having any muslin fabric with me. Also trusting Burda’s consistency in sizes. I’m quite happy with it, though the neckline could have been a bit smaller I guess.   And being honest: the hem band is a bit snug. I did not expect this, as the jacket is well above the widest part of my hips and normally the size 42 which I used is perfectly ok in this area. It is a close fitting jacket. Also the sleeves are not very wide.

For perfect fit I should have traced a size 38 at the neckline and widened the band a little AND have made a muslin first. But it’s certainly good enough to wear, this is not a wadder.

I did lengthen the body 3 cm above the waist. This was needed there, in the end I took the 3 cm off again from the bottom so that the finished length is the same as the pattern.

The sleeves look very, very long in the picture on the model in the magazine. Must be the models (petite?) size. After measuring the pattern I cut them 2 cm longer, ended taking one cm off again and they are the length I want now. That’s 1 cm longer than the pattern.

The lining

The cuff, very hard to find buttons in the right color.

Burda’s instructions for handling the lining at the sleeves were horrible (in Dutch at least). I couldn’t understand what they wanted you to do. Reading the instructions I understood that it would have been possible to do it all with machine stitches, I opted for handstitching the lining to the cuff opening. Worked as well for me.

There was a bit too much ease in the sleevehead. The line in the picture below shows what I took off from the cap of the sleeve.

The result is a nice jacket I'm happy with. My daughters (18) reaction was very positive when she saw it this afternoon. “That’s very nice mom”. It passed the most difficult test ;). I look forward to wearing it.

Friday, March 2, 2012

Jacket – the zipper

Two buttons to attach, then the jacket is ready for making pictures. As it’s 11.30 pm now here, that will be for tomorrow.

Below are pictures from the jacket as it was about a week ago, still unlined. I had a problem with the color of the zipper tape. I decided on an impulse to make this from the fabric I had taken with me to the house of my friend Valerie. Then I had to buy the necessary notions like the zipper after starting construction. Difficult, the color range of (separable) zippers is not very large here.

Burda’s instructions let you cut a piece of fabric and press that in 4 layers (front + back + 2 times seam allowances) and fold that around the zipper tape. Too bulky anyway, but think of the top and bottom of such a construction. Valerie suggested using a ribbon instead, which was a good idea. But also difficult to find in the right color, as my fabric has difficult “pearl/oyster?” shades.

The first picture is the zipper without ribbon. Too dark but the best I could get! The second an off-white ribbon. In the shop I thought it would be ok, but too white and too much shine.

This is the ribbon I used in the end. In the picture it looks a bit dark still, but it’s fine.

Another option would be to make a seam in the left part of the front and sew the zipper in the seam. I only thought of that option after having cut all parts with only scraps left (of course!).

First I basted it to the jacket and then stitched it on both sides. This will be the first item for spring. I’m so longing for a bit of sunshine.