Tuesday, March 29, 2011

Machine buttonholes

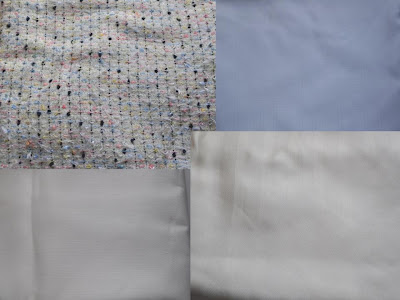
I did test the buttonholes (of course). First with black thread, mainly because that was on my machine from a little in between job for a friend of my daughter. But it also helped to clearly see what the result of the buttonholes was. I also tried a buttonhole with a rounded end, but that is not my favorite on my machine, I don’t get that one quite right.

The first one on the left was the default buttonhole, center right with a different setting, top right with a filling tread. That was the one I chose to use, and I tried it with the right color thread too. This is the one bottom right.

And guess what happened? After 5 trial buttonholes with no problems the first one on the jacket went wrong!! I unpicked it and did it again, but what a pita!

On the picture below you can see the fill thread. You pull on the thread so that the closed side of the fill thread will be on the end of the buttonhole. This way it also reinforces the point that will get the most stress when the jacket is worn closed.

Here the thread is pulled through (on my machine it goes smoothly over the bottom thread, the upper thread usually gets a few stitches and can’t be pulled through anymore).

The tail ends are cut off and here is the front with all the buttonholes. I didn’t open the buttonholes yet.

Friday, March 25, 2011

Jacket – working on the inside

Some pictures of the work on the inside of the Chanel style jacket. Thank you for the tips on recovering lost pictures from a memory card. I didn’t use it this time, as there were only 2 or 3 pictures on my jacket lost, the rest of them were intended to be lost, as I’m doing a photograpy course and doing a lot of testing photo’s that were not worth keeping. But it’s good to know, I might need it in the future.

I’m not following the instructions in every detail. I’m using a not too firm hair canvas as interfacing on the front, instead of normal sew-in interfacing. I want to be sure the top doesn’t flip over like a jacket I made 2 years ago. This might be too much for the original style, but it’s my jacket, you won’t see this when it’s finished.

The lining and the interfacing on the front are quilted to the fabric, but not in every so many centimeters, but in pairs of two, spread over the pattern pieces. The instructions tell you to adapt the quilt lines to the pattern of your fabric, if applicable. I made sure the quilt lines are between the vertical black threads in the fabric. You can still see the diagonal baste lines that were done before machine quilting.

The interfacing on the front and the back (with lining, looks much more wrinkled than in real life.


Instead of only using an oval piece of interfacing at the location of the buttonholes, I used a strip of thin interfacing over the full length. My handsewing is not great, I’ll make buttonholes by machine, sure with better result than hand sewn buttonholes would be with me.


And per instructions: tailors’ tape on the front.

And the back neckline interfacing.

Hope to do some work on the jacket this weekend. And perhaps do some blog reading again, there’s not enough time in a day ;)

Saturday, March 19, 2011

Rolled hem on thin fabric

Progress on the Chanel style jacket is slow, as expected. I do plan to share my progress and a few construction details with you, but to start with I accidentally erased the first pictures from the memory card. And Sheila, I don’t want to raise the bar for anyone but myself. It’s been on my to sew list for a long time, I’m happy I finally started it, but not quite sure how long it will take, it might be quite a bit longer than I thought.


To differentiate a bit, I’m working on a blouse as well, part of the new spring garments I want to make. This is a sheer, thin fabric as you can see in the pictures, the grid shows through the fabric. I tried to serge the edge of the collar that will be folded to the inside (it’s a wrap blouse) and didn’t get it right. In a Dutch  book on serger techniques using a water soluble stabilizer was advised. I didn’t have that anymore. Instead I used a fusible table, ironed it in the seam allowance and then serged with a rolled hem on the inner edge of the tape. This worked perfectly and the hem is straight and a bit firm.

Next post either on the blouse or the jacket.

Saturday, March 12, 2011

Slow sewing

And this time I’m not referring to speed of sewing or the lack of finished projects lately. It’s time for a more complicated project again and I’m starting a Chanel style jacket. The pattern was very kindly lent to me by Jane (you know who you are) THANK YOU again! The “deadline” I have in mind is the PR  Brussels weekend April 9-10, so there are almost 4 weeks to go. The pattern is by Claire Shaeffer and has two variations: the couture construction with quilted lining and the more rtw construction method. I will follow the couture construction, which has 99 steps. A few less for me, as I will omit the upper pockets for obvious reasons. Still a lot of steps to do, and I want to take my time and perhaps sew an easy top in between.


The fabric I’m using is the bouclĂ© in the upper left corner. I showed this picture in an earlier post with my spring fabric plans.


The muslin was made end December and this is the second version. First I made a size 14, a size I’ve used for Vogue tops before. It was too small everywhere, so then I traced the 16, which was pretty good.

I’ve given a bit more waist definition to the pattern, because I didn’t want it too boxy. Further I took a bit out of the front shoulder seam, the center front remains more straight that way when worn open. I posted about this alteration in this post (scroll down a bit).


The back doesn’t look very good in the picture, but it’s better in real life and with a shoulder pad, which I didn’t use in the picture. The sleeve is a bit strange: it feels a bit snug at the inner side, but has a lot (too much?) space in the sleeve head. I will follow the instructions and sew the body of the jacket and then sew the muslin sleeve in the jacket to check on the fit then.


And something most of you won’t understand: I cut away all seam allowances from the pattern, except the hem allowances. Working with seam allowances is difficult for me on complicated patterns like this. All parts have to be thread traced on the seam line, better not have the seam allowances then anyway. Isn’t it strange that I prefer patterns without seam allowances? European patterns never have seam allowances, so I learned to sew without them and like to work with the actual seam line. A lot easier when matching plaids or stripes too.

Friday, March 11, 2011

A skirt for spring/summer

Absent from blogland for two weeks again, but this time not so much to show. The Knip mode pants that I showed a detail of in my last post is a wadder. The fit in the back is no good at all and the fabric too stiff. In the next weeks I will continue my efforts to make a good pants pattern. I have lost a bit of weight, so I need to start again.

I made this skirt from the March Knip Mode issue. It’s an A-line skirt with side pockets and pleats that go over the waistband. When I received the magazine, the fabric used for the skirt immediately appealed to me and I ordered it online from Jerseyfashion. The fabrics they sell are mostly expensive, certainly if you compare it to US prices, but the fabrics I’ve bought are of very good quality. Just a happy customer, though I must say that though this fabric is a beautiful quality cotton, it is not really a bottom weight quality. It’s more a cotton I would use for a shirt. I would never wear a shirt with this print, so just used it for the skirt. I did line the skirt and used fusible interfacing where the zipper was inserted.

It’s nice to have this in the closet, with a white blouse or t-shirt it will be good on the first spring days. For the moment it’s still too cold here to wear it.

The front and back


Details of the pleats in the front


The magazine picture and line drawing. I think it’s one of the very few times I made a pattern in exactly the same fabric as shown.