I love to share my projects. It's mainly sewing projects and a bit of knitting too.
Tuesday, May 5, 2020
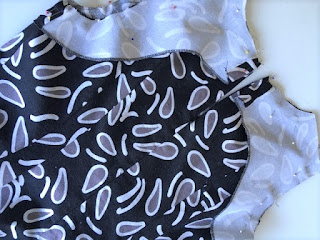
Finishing a sleeveless dress (facing or lining)
Thursday, December 20, 2018
How to sew a fly front zipper (including pocket lining)

There are several variations and a lot of tutorials on how to sew a fly front in a pair of jeans/pants. This is my take on it, a combination of how I learned it long ago, instructions for Jalie jeans, a video tutorial by Jennifer Stern (which I can't find now) and just doing it for a long time now.
The steps that I show:
- Are for a pair of womens' jeans/pants, closure with the right side over the left side.
- Use a pocket that is extended to the center front, the steps for the pocket are not shown.
- Can be used with regular pockets, just follow the instructions except where I mention that
- The pocket extension has 0.5 cm seam allowance at the center front for the left and is cut at the center front without seam allowance for the right side
The steps:
Fold the fly (it usually is a pattern piece that is cut on the fold) and finish the seams. Sew the zipper on top, stitching only the side that's closest to the finished edge. (My zipper is a bit longer than necessary, I'll cut it shorter after attaching the waist band)

Finish the seams of the front pattern pieces. I use a cut-on facing on the right side, the overlapping side on a womens' pair of pants. If you prefer you can use a separate facing, you'll have to sew that on as a separate step.

Pin the pocket/lining in place, the left side has the small amount of seam allowance as described above. (if your pockets are not extended to center front, omit this step)

Sew the center front until the point where the zipper will end.

Fold and press the right side on the center line. Make sure the pocket on the inside is aligned with center front. Topstitch till the crotch.

On the inside it looks like this:

I like to sew in the zipper a little off-center. Fold the left 0.5 cm beyond the center and press. Pin the zipper with the fly in place. Sew on the edge.


Pin center front of the right leg to the center front of the left leg.

On the inside, fold away the fly and pin the zipper to the facing of the right side. Only to the facing!!
Sew the zipper tape to the facing. The zipper is attached, the topstitching in the next steps does not have to be on the zipper tape, only on the facing.

I mark the end of my zipper with chalk, placing a pin to mark first. This way I know where the end of the zipper is. Especially important if you use a metal zipper, which would break your needle if you would hit in while topstitching.


Wednesday, December 5, 2018
How to insert an invisible zipper (without pucker)

After the test post (thank you for your input, I'm debating/considering options) let's get back to sewing.
A while ago I learned about a great, yet simple technique to avoid the little pucker at the end of an invisible zipper. I insert my zipper this way all the time. Though the trick is at the last step of inserting the zipper, I include all steps I do for inserting a zipper.
Disclaimer: as always when I do a tutorial, there are more ways to do it, this is just my take on it.
Wednesday, April 18, 2018
Welt pocket with angled seams
It was fun to read your answers to the post with the picture of the strange pattern piece. Very good those of you who were close or knew the answer!
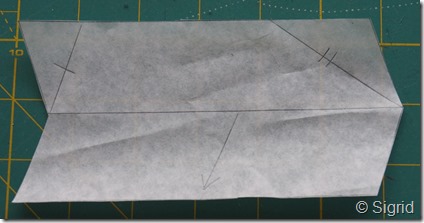
The welt is also called “origami welt”, I believe Kenneth D. King calls it that. Its main feature is that the seams are not at the sides of the welt, but as you saw in my previous post, on the back. It makes for a welt with less bulk.
Below the steps I took to make the pattern piece for it:
This is the original pattern piece, with foldline and straight of grain indicated.
On the part that will be the back of the welt, two lines are drawn where the seam lines will be. To clarify I’ve marked the seams with line notches.
The seam lines are cut and added to the front part of the welt
The final pattern piece, in paper and in fabric as shown in my “riddle” post. The fabric one is the mirror image, with seams added.
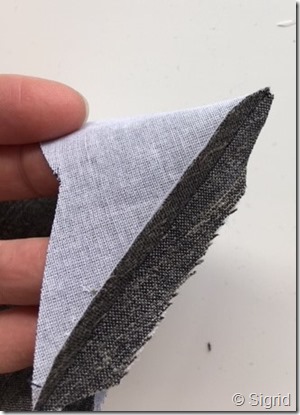
Sew the seams, matching the notches (I added 1cm seams to the pattern piece and made the edge match)
Trim to the points and press.
Turn the welt and press.
Two welts, ready to be inserted in the garment.
Thursday, June 9, 2016
Scallop edge–applying elastic
In my previous post I showed you how I used a tiny dart to get the scallop edge of lace to match the underband of the bra. Or at least, the main center part of it.
This means that elastic can’t be used as you would normally do, as now you can’t turn the elastic under the edge of the lace.
A picture of how it looks when finished:
First the elastic is attached to one side panel, the length of the center part is left open and the elastic attached to the other side panel. When turned the elastic is only topstitched at the center front.
The steps in pictures:
The side panel is attached to the front, making sure there’s space for the elastic to attach.
The inside, the lace panel is underlined with non-stretch tule. The side panel is a double layer. The tule used has some stretch. I use this because my lycra has a lot of stretch and does not give enough support when used as a single layer.
The picot elastic is attached with a zigzag stitch, meeting the edge with the lace exactly.
Measure the length of elastic you need for the center panel and mark the center front and end with a pin. (I used to take off 15-20% of the length of the pattern piece, but nowadays I just stretch the elastic and eyeball it)
Attach the elastic to the other side panel, take care not to turn it over in the center.
Turn the elastic, pin the elastic to the center front, just hiding the picot edge under the lace and topstitch with (triple) zigzag. In this case I would really prefer the triple zigzag as it’s wider and covering more of the width of the elastic. The result is as shown in the first picture. Below you can see that the center front elastic is only sewn with the triple zigzag.
Thursday, June 2, 2016
A very tiny dart
One of the projects I’m working on is a new lingerie set. I wanted the scallop edge of the lace on the bottom edge. However, the bottom edge of the pattern is curved. I have posted how I do this before, but it’s many years ago (blogging for over nine years now!). So not too bad to post about it again.
This is the pattern piece, including seam allowances (a bit irregular as I traced this on sturdier paper for the pictures).
If you want to use the scallop edge at the bottom, the seam allowance must be removed.
Position the center front where you want it. I always use a deep point of the scallop. Also keep in mind how the center front will look like when sewn together. At the center it’s deciding where to have a little extra, imagine a straight line till the bottom of the curve of the pattern.
I clip the pattern to the edge and leave just a hinge. The right part is then moved down to meet the scallop edge, creating a tiny dart. That dart is marked and sewn, resulting in what you see in the first picture. After the cups and channelling are inserted, the dart will hardly be visible.
In another post: how to add the elastic to the bottom edge when using this construction.