A couple of weeks ago my daughter and I were discussing summer wardrobes. Both hers and mine. It helped me decide what to make for myself and it led to a few requests from my daughter. I’ll try to share the more interesting items here.
This dress is high on my daughter’s wish list. A lovely summer dress but of course, no pattern for it. She knows I like a puzzle😃 Then there was a strange coincidence: one of my students (I teach sewing since a couple of years) was looking at the Esther dress from StyleArc. It has the basic lines that I could use for the dress.I love to share my projects. It's mainly sewing projects and a bit of knitting too.
Tuesday, May 26, 2026
Loving a puzzle
Tuesday, August 27, 2019
Random projects
This post contains pictures of a few projects I made in the past months. I didn't take notes of any details, so present them with their line drawing and only minor details.
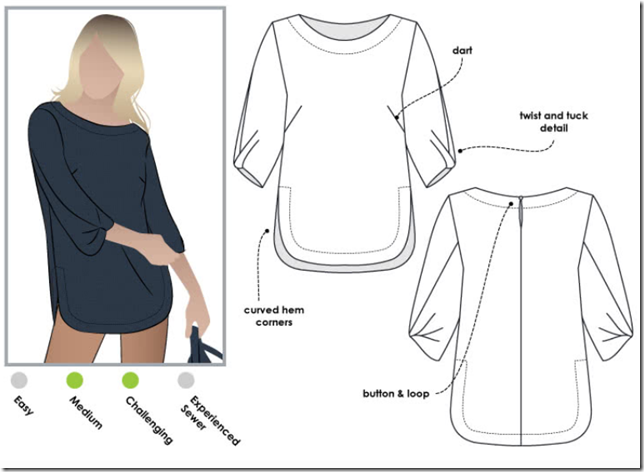
StyleArc - Sadie top
I've made this before and made a verwion for myself and one for my daughter (the striped version).

Vogue 8972, also a dress I made before in plain linen fabric. This time around I made it in a print, but as not to lose the design lines, I used piping at the waistline, the neckline and the armholes. Definitely a more formal dress. Made from cotton with a touch of lycra, very comfortable to wear. One of my favorites at the moment when I need a formal dress.
Saturday, February 10, 2018
Twist detail
Twists in garments have been around quite a while now. I believe it started with a famous Burda top in 2004 and I made my share of garments with a twist. Not very many, maybe 2 or 3. Now I did two in a row. This post is about a StyleArc pattern: the Sadie top.
This time the twist is not in the bodice but in the sleeve. A detail I immediately loved and wanted to try. I don’t know when this pattern was released, but I only noticed it a couple of weeks ago. I ordered the pdf pattern and one thing I noticed was that the front was not a complete pattern but half, to be cut on the fold. It’s been one of my little irritations that StyleArc used complete patterns when you could just as well cut the pattern piece on the fold. It saves a lot of paper and it also means less tracing/taping of the pages. Hope they do it for all patterns now. Great improvement!
‘
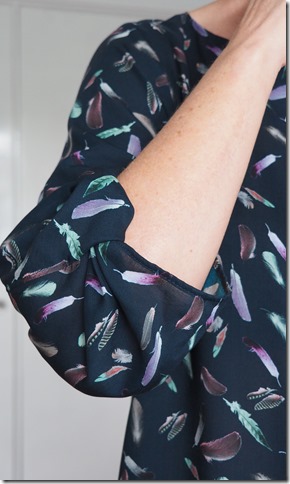
The sleeve detail is really nice. You definitely need a thin fabric with good drape for this. My fabric is a viscose (rayon) and perfect for it.
It’s a loose fitting top, can easily be worn over a pair of trousers like in the photos of me wearing it, but it’s also very good tucked in.
The pattern is labeled as medium/challenging and the sleeve isn’t for beginners. The rest of the pattern is easy.
I’ll try to illustrate my take on sewing the sleeve. Photos taken with my phone in the evening, not the best.
My first step was serging all seams, without cutting any fabric off, so that the seam allowances remained.
The hem of the sleeve must be finished till the notch on the pattern. I folded the serged hem twice and stitched it (stitching not in photo)
In the curve I used the same approach. The advantage to me was there is no clipping of seams this way, which might make for holes or fraying of fabric.
After twisting as in the illustration in the instructions it looks like this:
The seam is sewn till the twist and then it’s almost a sleeve like any other sleeve. Stitch the sleeve seam and insert in the bodice.
Friday, July 14, 2017
StyleArc Evie top
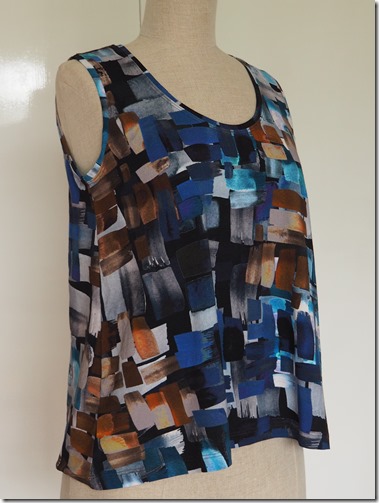
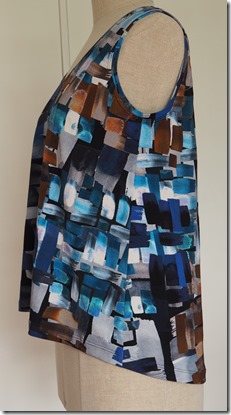
At StyleArc’s site this is simply described as Knit tank top with a shaped hemline. I would add that is has some flare. I made my second version this week. I added a little bit to the flare.
This is the first one I made, shown as work in progress a few weeks ago. It’s still the only picture I have of it, but it’s been worn and washed several times already (it is hemmed and topstitched after this photo was taken).
Being such an easy to wear style on warmer summer days I made another one, in a fabric with a print this time.
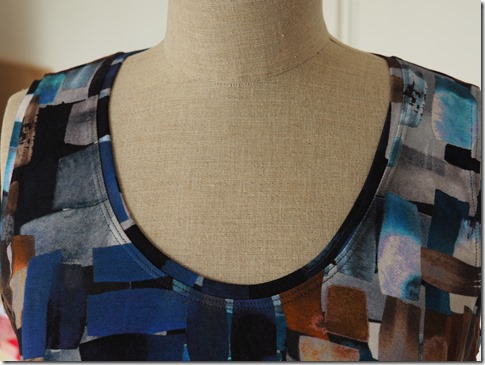
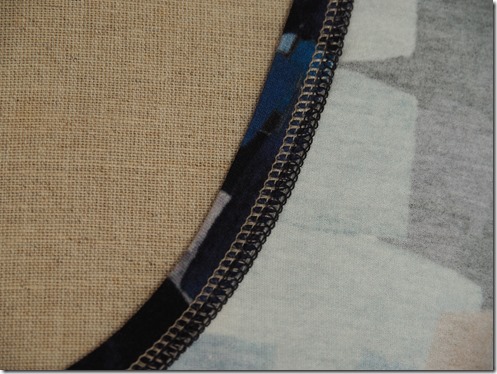
In the past I’ve had some problems getting at ease with my coverstitch machine, but we’re working well together now. I’m very happy with the finishing details.
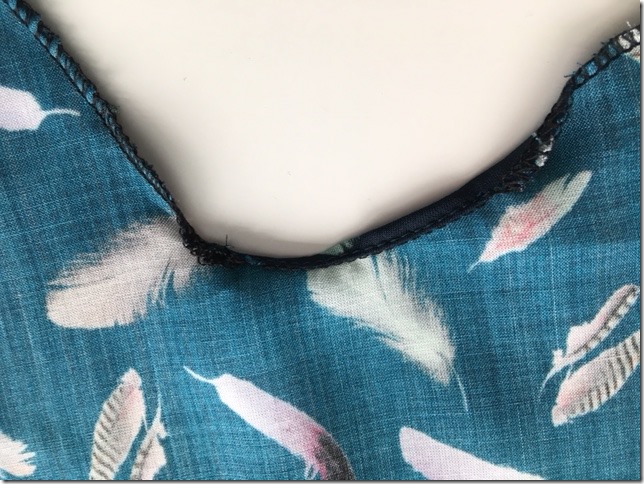
Inside of the neckline. There was a tan coloured thread on my serger, the black is from the coverstitch.
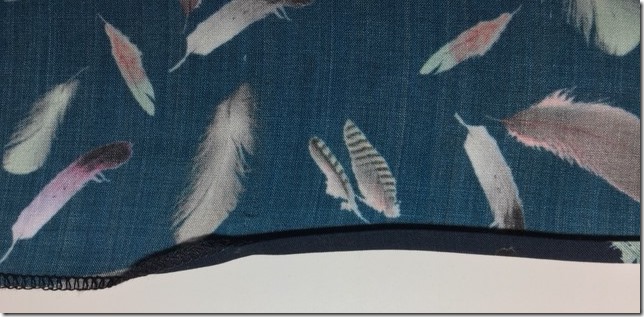
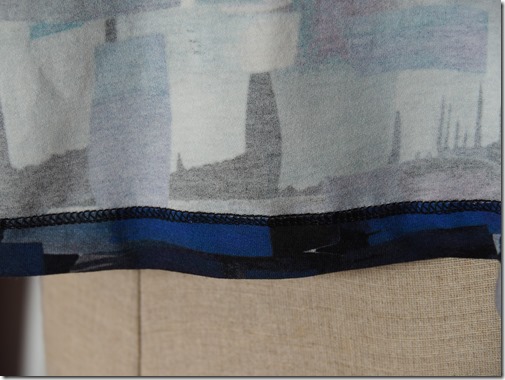
The hem, done as I described in this post. Basting it first makes it take 10 minutes extra, but so worth it. The cutting line is enclosed by the stitches.
Wednesday, May 3, 2017
Christia pants
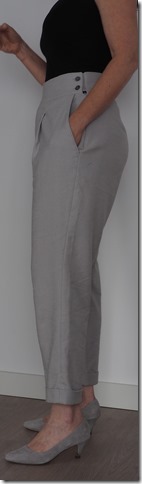
Last week I showed you how I did the cuff on the pair of pants I was making and today I can show the finished result. It’s made in a linen with some stretch. It may not be the best style on me but I don’t think it’s that bad either. I like it for summer.
It even has pockets that work well. Often this style of pockets stands away from my body because of the curve in my figure but these are more narrow, a straighter angle if you know what I mean.
This is how I did the pocket edge. This is a pattern piece that is not mentioned in the overview of included pattern pieces but it’s there and if I understand StyleArc correctly it has to be cut from fusible interfacing and applied to the pocket edge (the instructions talk about pocket edge, pocket bearer and pocket bag. Not intuitive to me and I’m glad I know how to construct a pocket without instructions). As I prefer the pocket lining of a thin fabric (lining or cotton) I cut the pocket edge of the garment fabric and from a piece of silk organza. The edge of the pocket was on the straight of grain of the organza. This way I make sure there is no stretch in the pocket opening. I placed it on top of the pocket lining and treated it as one layer during construction. This way there is no lining fabric visible if the pocket is open a bit.
I did not make the side zipper all the way up to the waistband. I could not find a long enough zipper in the right colour and decided to make buttons in the waistband. Improvising a little here as the waistband had already been cut and I could not re-cut. A little hole is visible above the zipper but it’s not bothering me too much.Will probably wear it with a top over the waistband anyhow.
To conclude: a nice pattern that I only had to tweak a little. I had to heighten 2 cm and take in a bit at center back plus I made a contour/shaped waistband to get a good fitting waistband.
Thursday, April 27, 2017
Cuff on pants
Thank you for all your nice comments and congratulations on my 10 years of blogging. It’s so nice to know that you appreciate my posts and even are inspired to try something by it.
Today I’ll do a post of the kind I like very much, a tutorial (or my way of doing things). This is about a cuff on pants. It’s been a while since I made a tutorial and I can’t even remember the last time I made cuffs on a pair of pants.
The pattern I’m using is the StyleArc Christia pant. Their description is: A trendy crop pant with all the new style features you have been waiting for. Wide waist band, side pockets, pleats and cuffs that sit just above the ankle gives this casual pant loads of style!
To be very hones I’m in doubt of this style on me, but nothing ventured, nothing gained. I made a pair of trousers last year which were very narrow at ankle height and I confess to not wearing them. These are a little wider and I just wanted to try them.
Instructions are sparse and there’s even a pattern piece that’s never mentioned in the instructions. More on that when I’ve completely finished it. So this is my take on doing it, not StyleArcs’ instructions.
For the cuffs I marked the fold lines completely and basted them. On the pattern there’s only a mark at the edge but it’s so much easier to work with the whole line marked on both sides of the fabric. Belief me, it’s worth the extra 10 minutes of doing this.
Then I clipped on the fold lines to the stitch line of the seams (of course not through the stitching). The seam is folded on top of each other and if your fabric is a bit substantial, this will cause a lot of bulk. By clipping and alternating folding to each side of the seam this is more evenly distributed.
The cuff is folded (right sides together) on the top line (furthest from the hem), pressed and then stitched. This stitchline won’t be visible and helps in keeping shape.
Tip: fold your cuff first without pressing so that you know how it’s supposed to go together.
The next step is folding over the lowest foldline to the inside and press! Then fold the middle foldline (which is the top of the cuff) over. This is how the inside looks.
My “trick” to keep the cuff in shape and easer to press after laundering is stitch again behind the cuff. The cuff is folded down and then I stitch through all layers. The last step is a stitch in the ditch in the seams to tack it.
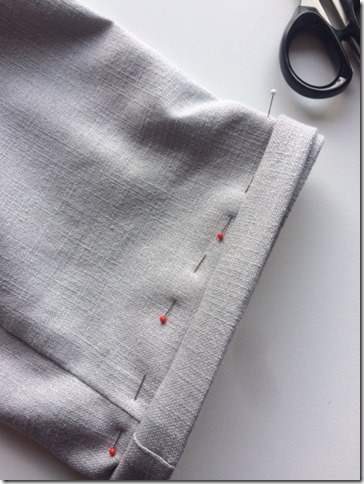
The resulting cuff:
The pants are not finished yet. I’ve made a waistband from muslin. The waistband is wide, 7.5 cm (3 inch). The pattern provides a rectangle pattern piece. This is not working on me when the waistband is a normal height, let alone on a waistband twice as high.
Making the waistband from muslin first gives me the opportunity to pin it to my shape. In this picture you can see there’s quite a bit of shaping involved.
Also I cut the back waist with a very generous seam allowance as I know that’s where I often need to change. I needed an extra 1.5-2 cm. My next step is to make a pattern piece of the waistband.
It’s King’s day today in The Netherlands, which means it’s a national holiday and lots of flags with an orange banner in the streets. Orange being the name and colour of our royal family.
Monday, March 28, 2016
About t-shirts and hemming with coverstitch
Pictures of the finished skirt have to wait. I want to hem my skirt with “steam a seam” tape but forgot to buy it and as most of my fabrics and notions are in storage, I had none available at all. So I spent my weekend sewing two t-shirts. The pattern is the Ann T-top from StyleArc:
I’ve made this pattern several times now and it’s a great basic. After the initial one last year (never blogged about as far as I remember) I removed the gathers in the front by folding up at waist level.
Until recently I used an old Ottobre pattern from 2007 as my base for t-shirts, which is still a great pattern. But, as you can guess, it’s in storage (by accident though).
The neckline and hems of both t-shirts were finished with a coverstitch.
I’ve had a love/hate relationship with my Janome coverstitch for quite a long time, but have become used to it and now it’s taken out and used regularly. For a long time I did not use it properly either and on the inside you could see the edge of the hem stick out above the stitches. Recently I saw a tip about how to make the finishing on the inside neat. Looks good doesn’t it?
What I did was
- Measure and press the hem at an exact distance (a sewing gauge will help)
- Baste the hem at the very edge of the hem. I preferred hand basting but the tip I saw used long, straight machine stitches. I found those more difficult to remove afterwards when I made a sample.
- Stitch while guiding your foot over the basted line
- Carefully remove the basting thread.
I did this both for the hem of the body as for the sleeves and it works like a charm. It might be a bit more work, but the result is much better.
Sunday, February 14, 2016
Hello
It was a bit of an unsettling time, sorting out our belongings, what to take to the temporary home, what to put into storage. At the end of the day one box with sewing stuff ended up in storage by accident. Fabrics I planned to sew this spring were in that box as well as most of my thread. Lucky enough not my collection of interfacing, that would have been worse.
Of course this was an excuse to buy new fabric ;). I bought a remnant piece of a border print online and when it arrived it was not quite what I expected. I forgot to take a picture but there was too much going on and too big a difference between light and dark. Which made me creative (good!) and I used the dark part for a skirt and the lighter part for a top. I won’t wear those together though they come from the same piece of fabric. Pictures of the skirt in another post.
For the top I used the Esme pattern from StyleArc.

I had a top in mind I had copied from a BurdaStyle magazine many years ago, guessing it was from an issue published in the (early) nineties. But in the great purge I let go of that pattern thinking “I haven’t made it all those years, so it can go”. Of course it now was on the back of my mind and when I was searching for a pattern to use for the remnants of the fabric that top seemed the pattern I needed. Then this StyleArc top appeared in the Pattern Review gallery and the neckline was quite similar to the BurdaStyle pattern I was thinking of. Bought the pdf in the Etsy shop, traced the pattern (as described in a previous post here) and made it in an evening. Almost instant gratification.
As I did not have enough length of the fabric I had to make a horizontal seam. The bottom part is on the crosswise grain, against all sewing “rules” to cut in the same grain direction. There was just not enough fabric and this was the only solution, including the horizontal stripe that is not at the most favorable position.
The neckline is wider than the illustration suggests.I interfaced the collar with Pro Sheer elegance light interfacing. Both the collar and the interfacing were cut on the bias. The instructions don’t tell you to interface the collar but I thought it wise, as the fabric, a light ponte knit, would not have a lot of stability. I’m glad I did but still the collar won’t stand up as in the illustration. I quite liked the idea of being able to wear it in two ways, but am satisfied with the folded collar, which looks nice on me. I will try to get pictures of me wearing the top.
Finally I topstitched all seams, as indicated in the pattern as one of the ways to finish it.
I like the result of this top, I would not have bought this fabric if I had seen it in a shop, but I’m actually quite pleased with how it looks.