Next up are two pairs of pants, a blouse, a summer dress and possibly a black jacket.
One of the pants will be of tan linen, which is the exact color that’s in my jacket and will also will be combined with these fabrics:
In the first picture on the left a cotton which is already cut using the pattern for the “artsy polka dots blouse” that I made recently. In the second picture on the left a knit, one of the t-shirts I made.
In the middle the linen and on the right a piece of black fabric that I used for a skirt last year. It’s only 1.20 meter long, Í’m going through my patterns and magazines to see whether I can find a jacket that can be made of only that small amount of fabric. In any case the blouse and pants could be combined with the black denim jacket I made this spring too.


The next pair of pants is a grey denim. The pictures don’t show it too well on my screen, but it’s quite a bit darker than the linen.


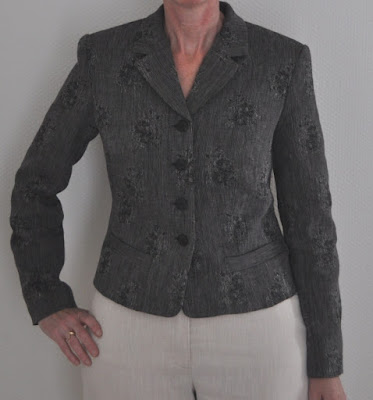
And last in the queue this fabric, from which I want to make Vogue 8472.


I hope to make these garments in June, for my own guidance I’ll make a list in the sidebar to keep track of what I’ve done.
PS: thank you all so much for your resources for petersham, I'm looking in to them and probably order some soon too. At the moment my friend Valerie was looking for it, but I want to try it myself too. This time I won't be in London, so I won't be able to go the shops mentioned there, but certainly keep them as reference.