Friday, October 25, 2019

A jacket - Burda August 2019

Change of plan, instead of showing recent makes, I'm documenting the making of a jacket, to share and for my own future reference.
The pattern is jacket number 113 from August Burda. A lovely design that I planned to make since I saw it. It's been quite a long time ago that I made a jacket and I really felt an urge to make one.


Pattern tracing and changes

  • I traced a size 40 at the upper body, grading out to size 44 at hip height.
  • Added 3 cm to the upper body pattern pieces (default change for me).
  • Sleeve length looks fine, no initial change. Decision will be taken later.
  • Did an FBA to the front and side panel.
  • Compared the pattern pieces to my sloper. Looks fine but a bit more ease might be better, so I cut with wider side seams.

Preparing the pattern pieces

As always, I'm not following Burda instructions and doing things my way. That is, the way I learned from several real life or online teachers and books over the years. 
  • The front pattern pieces were interfaced with a heavier fusible interfacing. The area for the pleat was cut out. I think it will make the pleat less stiff, but it's a "call of judgement" that I'm not sure of.
  • The side panel has an extra layer at the top.
  • The back pattern pieces have a light weight interfacing. Both the center back pattern as the side have extra interfacing at the top.
  • On the front I've added a shoulder shield, to prevent a dip of fabric in that area

You may notice there are pencil lines on all pattern pieces. Those are the seam lines and notches. In this fabric and with the interfacing on top these lines won't be visible on the outside. So I didn't bother with tracing paper or wash-away pens.  As always I prefer to work with actual seam lines over default seam allowances.


Shoulder shield

This article in Threads magazine discusses the (inner) construction of an Armani jacket. It might have been the first time I read about a shoulder shield. Later I saw it used in a Craftsy (now Bluprint) class by Alison Smith. I've used it in many jackets since. 
The canvas is cut without seam allowance and 2-3 mm inside the seam at the front/neckline in this case. A fusible interfacing is cut that is slightly larger at the shoulder seam, the armhole seam and front, but does not cover the whole canvas at the bottom. Fusing this over the canvas makes the canvas stay put.


This preparation took quite some time. I hope construction will go smoothly.

A sweater finished

I've quite a bit to show, it's been a productive few weeks :). Mainly because I enjoyed a lovely sewing week together with my sewing friends. This was the 8th time we did this and it's been so lovely again. It has evolved in a week that's almost as much about cooking and enjoying meals together as sewing. And of course chatting, sharing ideas, fitting help etc. Perfect "me" time for all of us.
Over the next week I'll try to show the sewing results, for now I'm sharing the sweater I made. It's a combination of a ziggurat pattern by Asa Tricosa, inspiration I found in another design and cables.

The cable is from the book "Knitted Cable Sourcebook" by Norah Gaughan. Very inspiring! I took one of the cable charts, flipped and rotated and came to this design.


I'm very pleased it worked, as this is more "free-style" knitting than I"ve ever done before. Something warm to wear during cold winter days.

Thursday, September 19, 2019

Black beauty bra

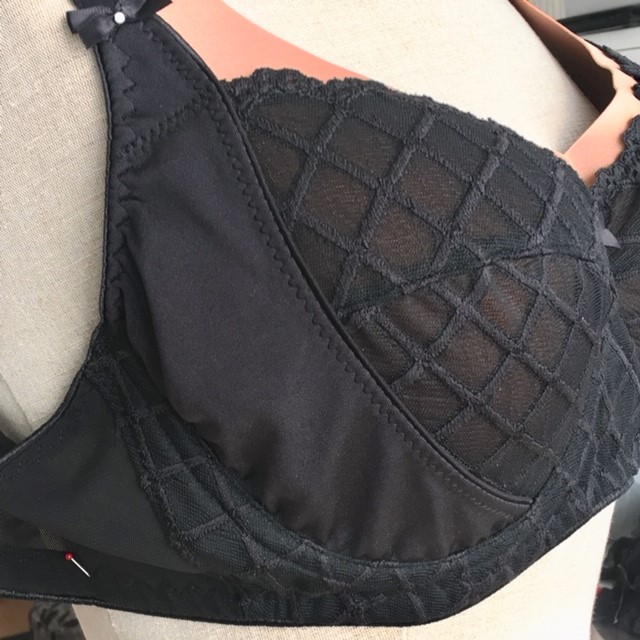
I totally forgot I hadn't put a post up on my latest bra. It's the black beauty pattern by Emerald Erin. A bit different by the external "power bar". When seeing the line drawing I had a little doubt, as it looked a bit low on the upper cup. But that's different for my size.

For the size I went with the size 32F at first and made that cup of a remnant and sewed it into a band of a bra that was not good. Then I did the same with the 32FF cup and that promised to be ok. Isn't this a fun look ;)?


I followed the name of the pattern with my choice of fabrics and lace. The lace has been around a long time and somehow I always was reluctant to use it. Good for a trial version of this pattern. 


The pattern has several views and can also be made with foam. I did not use foam (though I might try it at some point). I made the all lace version (view B) and love the result. The instructions are very good. I've followed along, even though I've made many bras before. The only thing that could have been better are the notches/marking of the under cup. An indication of center front and upper/under side would have been good imho. 
The back is different from what I usually make, but after a day of wearing has my approval, the external power bar has a slightly slimming effect (pushing the breasts a bit more inward).

I'm very happy with this bra, there will be more variations (soon  I hope).


Wednesday, September 4, 2019

Sewing lingerie again

Lingerie sewing has been on the backburner for a pretty long time. Somehow I didn't feel inspired and a complete failure with a bra last year didn't help. The bra below was finished last week. It had been cut months ago (March?) and was around in my sewing room since.


I didn't use a pattern, but copied a rtw bra that has a good fit. A good way to start sewing lingerie again, as a lot of the patterns I used before are not the perfect fit any more. So the quest for good fitting bra patterns starts again. I'm in the middle of trying a new pattern (and new to me indie designer) for a bra and I hope to be able to show you the results soon.

I went to the famous Kantje Boord shop in Amsterdam today. The best source for inspiration too. And of course lovely fabrics! My intention was to buy black based lace. Think I've succeeded ;).


Tuesday, August 27, 2019

Random projects


This post contains pictures of a few projects I made in the past months. I didn't take notes of any details, so present them with their line drawing and only minor details.

StyleArc - Sadie top
I've made this before and made a verwion for myself and one for my daughter (the striped version).


Vogue 8972, also a dress I made before in plain linen fabric. This time around I made it in a print, but as not to lose the design lines, I used piping at the waistline, the neckline and the armholes. Definitely a more formal dress. Made from cotton with a touch of lycra, very comfortable to wear. One of my favorites at the moment when I need a formal dress.


This is from the July 2019 issue of Knip mode, pattern no 11. The pattern has a center front seam, but I cut it on the fold.
A trial run as the fabric was a bit brighter than I thought (online fabric shopping has its surprises). It's a nice top and I made it in plain white too.

Wednesday, August 21, 2019

Vogue 1183 less formal

Vogue 1183 has been in my pattern collection for a long time. It's a lovely dress by Kay Unger. Very nice design lines with waist accent.


The only "problem": it's a more formal style and in my life I have only limited need for formal dresses.
At some point I was inspired to make this dress in denim and use topstitching in another color, as done on jeans. Unfortunately I didn't take notes on size used or changes made, I just have two pictures that I shared with my sewing friends on Whatsapp. I moved the center back zipper to the side and am certain that I took it in on the center back neckline, as I usually do. The waist is interfaced and has two layers of fabric to give it more stability.


It's a dress I loved to wear this summer. I did not line it and it was cool on a hot day. As you can see in the first picture the fabric was not very thick. For me a good combination of fabric and pattern.

Tuesday, August 20, 2019

Sweater with cables

Hello dear readers, nice to see you here again.

I've restyled my blog a little, not completely there yet but for the moment it's working. In my absence I've been sewing and knitting and will try to catch up a little. Quite a bit of what I did in sewing was basics like t-shirts, summer trousers etc. I'll skip those and in the upcoming posts I'll highlight a few more interesting garments.

This post is about a sweater (jumper in UK English) I knitted. Like the sweater I showed last year it's knitted with the ziggurat technique, developed by Asa Tricosa.
I simply love this way of knitting a sweater. It gives good opportunity to fit while knitting but most important: look at the way the armholes/sleeves are done. The definition of a seamline, but they are knitted (top down)  at the same time as the front and back of the sweater.


I incorporated the pattern Piper by Carol Sunday in a ziggurat (with a few minor adaptions). I loved combining this. Doing that is certainly keeping your mind of other worries!