Friday, December 21, 2007

Sewing plans


Well, I got some sewing done today. When I cut my black skirt, I also cut a vest from the Knip Mode magazine. Not to wear together, but there was enough fabric left for this vest, which I wanted to make. I made the outer shell and cut the lining (the black dotted fabric), and hope to finish this project this weekend.
On the end of this post there is a description how I made the single welt pocket. I'll write another post to show how I do the lining for such a vest.

There are quite a few other projects that need to be finished and one for this weekend too: my DD wants to make/have a new dress for Christmas and I agreed to make one from the November BWOF issue. Fuchsia pink with black bow is the idea. No opportunity to get bored I guess..... Planning could have been better.

This week I gave up on the idea of finishing my jacket before Christmas: I was misinterpreting something in my Stitch and flip jacket class on Pattern Review, and it became only clear to me what I was not getting at the end of the course. I'm still convinced that it will be a fine jacket, I just waited till it became clear, I've not cut something very wrong or something like that, but there's simply not enough time left. And it's not as if I had nothing to wear!

Further my denim skirt to finish, a lingerie set I want to make and last but not least: I want to try making a bag (how long is holiday season? One month, please tell me it is!).
Call me a fool, but I want to make this bag, while I never made one before. Or is this really not a good idea? Anyone experiences with bag making, please tell me!


Some technique to share: a single welt pocket.
Blogger is not very good in layout with pictures, so the description I have put in a pdf-file too, which you can find here.

Prepare the area for the pocket
Reinforce pocket opening by ironing a 4 cm wide fusible interfacing to the wrong side of fabric
Mark the pocket placement with chalk lines on the wrong side

In my garment there's a dart crossing the pocket. I slashed this open and pressed before applying the interfacing to prevent bulk on one side.


Baste along these chalk lines, so that you can see the lines on the front of the garment. The distances between the horizontal lines is the height of the welt.


Fold strip for welt in half lengthwise, wrong side inside and press .
Mark the width of the welt with chalk or baste this line (no separate picture, you can see it on the picture below)


Pin welt on right side along placement line.


On right side, pin fabric for back pocket over attachment line, right sides together.


On wrong side stitch horizontal lines on the basted lines, exactly to the corner. Use smaller stitches towards the corner and make sure the length is exact.


Cut the fabric between line, make a diagonal clip towards the corner. Don't cut the welt.


I graded the seams of the welt, because the fabric is a bit thick. When the fabric is not that thick, you can leave this step out.


Pull/fold the welt and back pocket part to the inside. Press the seamlines.
Pin the pocket lining to the seam of the welt, stitch.


From the inside, pin lining and back pocket to the triangle and the welt.
Stitch very close to the front of garment, preferably with a zipper foot. Stitch pocket too.


Press from the right side. The pocket is finished.

Wednesday, December 19, 2007

Back

Back from Londen (already since Monday night, but first a few other things to attend) I have no pictures to share from the Victoria and Albert museum. It was not allowed to take pictures.
But wow, this exhibition was worth coming to. Like Melissa who wrote in the comments, it took me over two hours too to see it. And the friend I was with (who is not a sewer) enjoyed it too.
There were many details to see (only sometimes I would have liked a mirror so the back of the garment could be seen better). There were short movies from catwalks, or undergarments that were worn, Audrey Hepburn etc. The music in the background was from that period, but really in the background, not too loud. Really wonderful.
And I wish I worked at the museum, so that I could peek into the construction of these garments better, you don't really see that part obviously (sorry Carolyn, no details there).

In the evening we went to the Royal Albert Hall, listening to Christmas carrols from the London philarmonic orchestra and choir, which was an experience I want to share with my family sometime.

Next day we went to Kew Garden, to see the Henry Moore exhibition, which was fabulous too. I admire his sculptures for years (am really very fond of more abstract sculptures and art in general), and never saw an exhibition with his work on this scale.
We had great weather (as I had hoped it was not raining, just freezing a bit) and had a lovely English lady as a guide at first, and afterwards we explored on our own.
Though not at all sewing related, a few pictures. Not much sewing with me at the moment, too busy with work and other things.


Thursday, December 13, 2007

A new skirt

After all my muslins it was time for some real garment, and it had to be a simple one. I want to have a new jacket and skirt ready for Christmas, and time is flying.
First there was our Sinterklaas feast and its preparations, this week my son had his 12th birthday (Hurray, 12/12 he became 12) and this weekend I'll spend in London, visiting the Couture exhibition in the Victoria and Albert Museum and listening to Christmas carols in the Royal Albert Hall. I look forward to this very special weekend, but together with my work there's not so much time left to sew next week.
The skirt I made was BWOF 08-2006-103. The review of this is here.

Two detail pictures here (lightened them so that you can see some details, black is so difficult to take pictures from). More pictures in my picture album.


As said, this was a simple project. But a black skirt is always a good item to have and I like this one's special back godets. The only special thing I did was adding tailor's tape to the waist, before lining, to prevent stretch.


Tonight I will cut lining and interfacing for the jacket that I'm doing in the Stitch and flip jacket class on Pattern Review. That's the jacket I hope to have ready end of next week to go with this skirt.

Hope London is cold but not raining. I will think of all of you when I'm at the exhibition. When I'm allowed to make pictures I share some next week.

Just a teaser from the museums website:


Sunday, December 9, 2007

One jacket out, one jacket in

Thanks to those who advised on the jackets. It's very helpful. The second jacket is definitely not going to be made by me. Look forward to versions of Tany and Vicky, but am convinced now that it will not work on me.
Summerset said that it should be longer to look good on me, Vicky that the style should show the waist. They're both right, but if I show my waist with a wide jacket, it will give more accent to my hips (which is not a plus of me). And for me that would only work with a sheat dress under the jacket, not with skirt or pants. I know because I tried a short jacket in a shop a few months ago.

The first jacket after a little tweaking in the back: with one shoulderpad, couldn't find the other one, and didn't have another pair. I narrowed the back in the princess line a bit, and a bit more in the waist, as suggested by Nancy K. A bit too much in the waist I think.

This is the fabric/lining combination that I'm going to use (sale started in a fabric shop with great quality fabrics, so I bought me a nice capsule of this bouclé, and black and brow fabric for skirt and pants!)


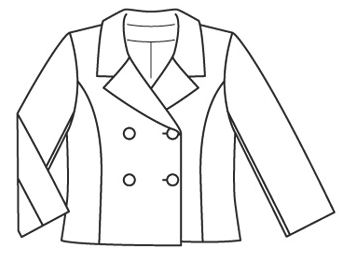
There is still a need for a second jacket, as I want to make one of the brocade I've shown you a few posts ago. Thus, another muslin for BWOF 12-2006-109. Also a princess line jacket with a special collar. Only to be seen in the line drawing, as the picture in the magazine is hiding this nice detail.
I like the general style for me and for the intended fabric.
After tissue fitting for the neckline, I lowered the gap on the neckline 3 cm, which is better.


The pattern needs more tweeking. For the sleeve the ease as such is good, but the marking for the shoulder point seemed incorrect, and the front had too much space in the side panel, resulting in puckers while sewing. Both problems must be addressed first.
And look at the difference one shoulder pad (on my right) makes on the back!


That's enough blogging for this weekend,

Friday, December 7, 2007

Two muslins

No progress on the skirt at all. I've been busy Tuesday evening and a part of Wednesday writing Sinterklaas "poetry". In Holland the 5th of December always is the moment in the year when children get presents. Sinterklaas is our Santa so to say. In the past 20-30 years the Sinterklaas event is getting less important for teenagers and grown ups, as with us too a lot of people give presents with Christmas. My family in general keeps to the old tradition, and Christmas to us is a feast of light, going to church on Christmas eve or morning, have a family diner, but no presents. Hard to understand for those grown up in another tradition I guess.

But the 5th of December is special if you do it with older children, like ours of 14 and (almost) 12 years old. We give presents and write a text that has to rhyme. And it is OK to make little jokes about someones habits or hobbies. It was great fun to hear the rhymes our children wrote, they're getting older, seeing and saying more and making good rhyming texts. I got quite some remarks about time spent on sewing sites, packages arriving with orders from overseas, and of course the time spent on sewing in general.

Enough sidetrack, back to the muslins for the BWOF jackets.
The first is for the jacket I want to make in the stitch and flip jacket class I'm going to take on Pattern Review. This class starts the coming week, so it had to be made now. The picture in the magazine doesn't do this jacket justice.


From the linedrawing I thought the neckline might be what I was looking for and it certainly is. It is a bit standing away from the neck. I tried a jacket recently in a shop with this neckline and loved it.
I traced a size 40 and did an FBA. It's still a bit snug, and I'll add another centimeter or two in the bust. Further I'll add 3 cm in the length. Though I do that by default for blouses or t-shirts, I didn't do this now.


The other is BWOF 2007-08-115, that I loved by the picture of it in the magazine. But I'm not so sure now I made the muslin whether it is for me. This one is snug too (but I cut a 40 and did no alteration, so that's not so strange). Before taking the pictures I forgot to open the pleat in the back. It has to be longer by at least 5 centimeters for me, but my feeling is that the pleats are not wide enough for a stiff fabric. The muslin is made from remnants of light denim fabrics, and the fabric I want to use is a bit crisp brocade. I'm in doubt.

What do you think? Are there any other changes necessary for the first jacket (back?) and what is your opinion on the second one? I really appreciate your opinions.


Q/A: Nancy asked what I wanted to use for the tabs. I planned to use a leather closing, but if I am making it, I might consider bound buttonholes and rather large buttons.

Tuesday, December 4, 2007

Topstitching and tutorial fly front zipper as pdf

As part of my 5 projects that I posted about early November, I'm making the gored Knip skirt again. This time in a light weight denim and adding a more visible topstitching, as suggested by Summerset at the time I finished my first one.

For the topstitching I use the GĂĽtermann thread that originally is intended for home decorating projects and not for topstitching. It's sold on a grey bobbin.
And I use a topstitching needle and a larger straight stitch. All those tips I have found on PR and blogs in the past year, just summing up here once again.


The topstitching itself is done in two rows. The first row is made with the blind hemming foot exactly to the seam line and the needle a few positions to the left (don't forget that, otherwise your needle will break, how I know??)
The second row of topstitching I make with a normal sewing foot, usually my transparent one. This one I use a lot, because it makes it more easy to see what you're doing. Depending on the distance you want between the stitch lines, you can use the outer side of the foot or the guideline on the foot to go over the first stitchline. And of course the needle position gives you even more flexibility.


For those interested in tutorials: I have made a pdf-file of the fly front zipper insertion post of September. I found a possibility to share a file, as this is not possible with blogger. Really looking for this, as I find it difficult to make a good layout with blogger, especially for a tutorial.

I do plan to make pdf-files of all my tutorials posted in the past half year. What do you think? Will this be helpful? And what other tutorials would be helpful? Is there something you're looking for and that you think would be something for me to write? Let me know, I'm not promising anything, but would like to know what I can do to help other sewers.

Sunday, December 2, 2007

Thank you

First of all I want to thank you all for the nice comments on my daughters coat, both here and on PatternReview. I had not expected to have so many reactions, and it feels very nice that something I made and posted about is so well liked.

Initially I wanted to go for a good walk on the beach today, but the weather was really bad here. Storm and heavy rain, so we didn't go. Good side to that: there was sewing time.

DD had another project in mind, and we made this together this afternoon. Aren't those DD's sweet, always wanting something new, even when you just finished her a coat! Just kidding, I really like it and am a bit sorry for my son. He's certainly not lacking in clothes (or attention), but the last time I made him something must be over two years ago, jeans and printed sweatshirts are his favourite. And I can buy them more easily than make them.

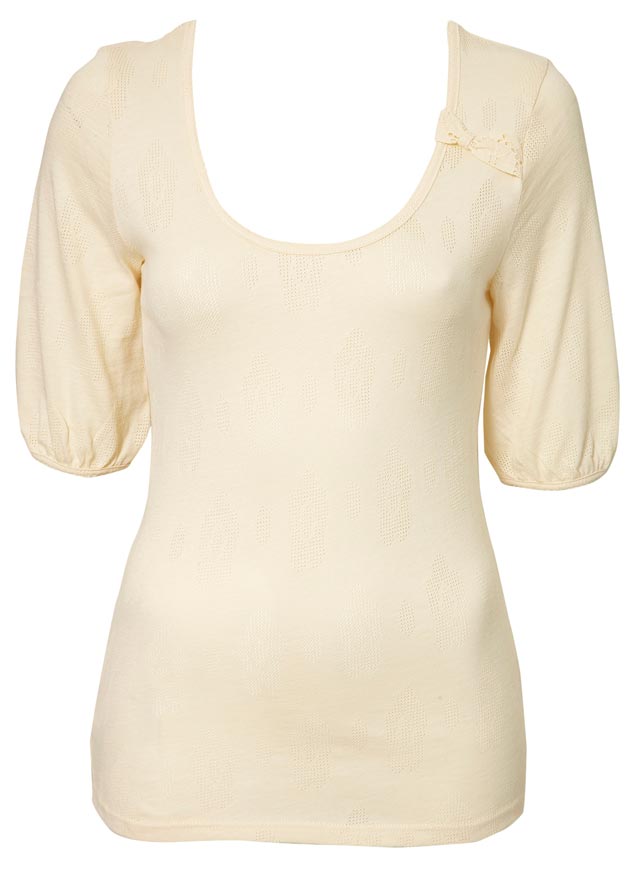
DD had seen the shirt on the left on the internet, but wanted long sleeves, tight on the bottom part, and puffing above that. Not so difficult. Based on the positive experience with Ottobre patterns, I let her trace her size (38) from issue 2/2007. For those who have this issue: we took front and back from pattern no. 2 and added 15 cm in the length. The sleeve with puff is from pattern no. 4/5, lengthened till below the elbow, then a narrow, just fitting square for the bottom part. The front neckline was made a bit deeper. This is the result partly done by her, partly by me.


For myself I cut two muslins. I am going to do the Stitch-and-flip jacket class on PR and I want to do BWOF 2007-11-114 in this class. The pattern must be made to fit before class.


The other muslin I cut is for BWOF 2007-08-115. Below you see the fabric I have for this, bought at EmmaOneSock. The jacket is special, and I'm not sure the style will be good on me. That's why I decided to make a muslin first. I would be very sorry to have this fabric end up in a garment I will not wear.