Showing posts with label dress drafting. Show all posts

Saturday, February 24, 2018

Border print

This fabric is a fabric that caught my eye, ordered it and made it up within two weeks. I made the dress for a dinner I had with friends on the occasion of my birthday. I finished it the evening before the event, which was lovely, but then the flu got hold of me. Nasty flu, been years since it got hold of me but this time it was my turn apparently. Haven’t sewn a stitch in two weeks, but now the energy is coming back. Time to show you the dress.

This border fabric was sold by panel, only 1.20 meter long. Which is not a lot to make a dress for someone with my height. It worked, though I had to cut the facings with a seam.

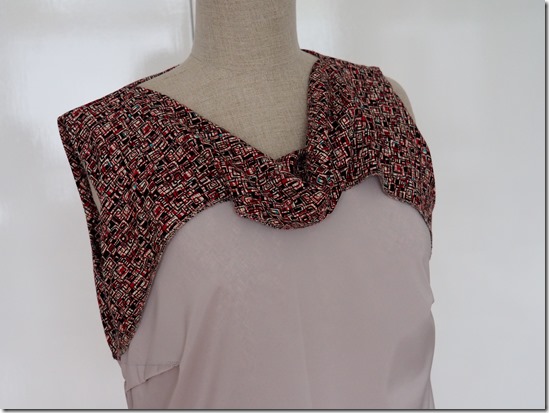
The pattern is based on my Suzy Furrer sloper, combined with a neckline that was inspired by New Look 6184. Thanks Viv for suggesting this neckline!

image

I don’t have this pattern but it was easy enough to rotate the shoulder, armhole and bust dart to these neckline darts. I left the waist darts in place, as that’s better with my figure.

P2240110P2240113P2240118P2240127

Pictures from the zipper and lining. All done by machine with good result. The front and back of the dress were sewn first, leaving the shoulder seams and part of the neckline open. I love this way of construction, which I learned in Sara Alm’s class on facings.

641A7438-B782-4945-B619-053E572FE9D8 (002)BDF27746-1802-45E5-ACFB-32DDE0514F71 (002)

Saturday, October 7, 2017

A self-drafted dress

This week I started and finished the dress I drafted. I made a few changes to the pattern, based on the muslin and comments and am quite happy with the result.

Let’s start with some pictures of the dress as is and some of how I’ll wear this.

PA070913PA070908PA070912

My intention from the start was to wear it with a belt.

PA070915PA070919PA070932

A combination for the coming season. The weather here is not for sleeveless dresses.

PA070925PA070927

And finally some pictures from the inside. I used a lining fabric with some stretch. It’s basically my sloper pattern with a straigh skirt. The facing for the back is a separate layer over the lining fabric, a method I use often.

The construction of the dress is the same as I showed last year for a sleeveless top. In this dress I added a zipper in the left side seam, to make it easier to get it over my head.

PA070948PA070950PA070951

Thursday, September 28, 2017

Dress muslin

The muslin of the upper part of the dress was easily made. I only cut seam allowances to the shoulder, side and center back seam. Then I marked with carbon tracing paper and stitched it together.
The result was definitely in the right direction, but a few changes were necessary.
I cut this on the bias, as I intend to do on with the fashion fabric too.

The back: I did not sew  the back darts and therefor took some extra space from center back and removed a bit of the side seam. It’s too wide and the back armhole is gaping a bit.
P9280880
The back with a bit more taken from the side seam and just a little bit taken from the armhole, tapering to nothing in the back neck.
P9280901
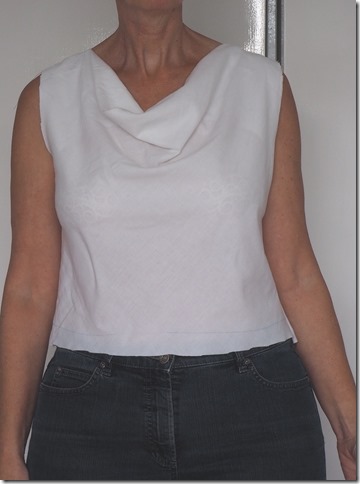
The front doesn’t look bad, no gaping at the armhole, cowl depth is fine. It could be a little less wide at the side seams too.
I haven’t made a dress from this sloper with a waist seam. Seeing these pictures and the line marking the waist, I think my waistline is too low. I’d like to hear your opion on that.
P9280882
This is the front after the side seams are taken in a bit. Could be a bit less?
P9280893
Before and after of the armhole. The armhole on the sloper is fine for a garment with sleeves. You need a bit more room for movement of your arms. On a sleeveless dress this is not an issue and I took out about 1 cm.

P9280886P9280900
Any thoughts on improving the fit are welcome and appreciated.

Wednesday, September 27, 2017

I’m in dress mode

When I bought the navy/black fabric I made the Burda dress from, I bought some other fabric too. This is a woven and a bit more expensive. I was not sure about what style I wanted to make with it. It’s just enough for a sleeveless dress that I can wear as it is or with a cardigan or jacket.

I contemplated making a simple dress with a cowl neck and draped the fabric on my dressform and yes, that’s what I want to make. I drafted a cowl neck top from my sloper some time ago and the result was a rather deep cowl neck. This time I wanted it higher. As I don’t have any fabric to play with, I decided on making a muslin first to prevent disappointment.

Like last year I’ll write a few posts about the process, not exactly knowing where it will end (do I have enough fabric for example?)

This is my starting point, my sloper for front and back.

IMG_5748

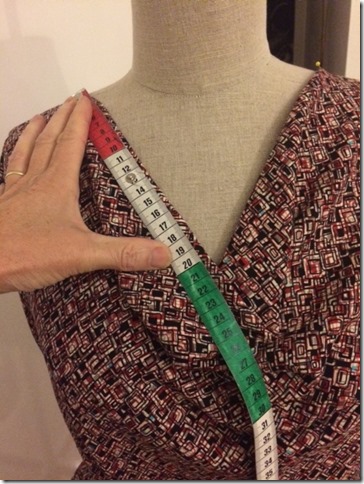
For the muslin I used only the top part. Unlike last time I did this, I did not rotate the waist dart out to make sure my cowl is not too deep. I took 1/4 inch from the shoulder seam at the side of the arm and drafted a 3 inch wide shoulder from which point a line is drafted for the cowl in a 90 degree angle to the center front. This results in a 21 cm line for the cowl (I know I’m completely mixing inches and centimeters, depending on the ruler I’m using, doesn’t bother me).

IMG_5751

The length of this line is important, as it defines the depth of the cowl. This is not something what is mentioned in the drafting class from Suzy Furrer (from which I used the technique). As I’m full busted and have wide darts, this means a long line/deep cowl when all darts are rotated out. This won’t be so much of a problem for someone with a small cup size.

I measured on myself, but for the idea this is what I checked.

IMG_5749

IMG_5752

The back has the same changes in the shoulder area. I ignored the shoulder dart (hence crossed) and did the same with the waist dart.

I’ve already sewn the muslin. A matter of half an hour or so. Too dark to take photos now so will do that tomorrow.

Tuesday, January 31, 2017

Drafting a dress - 4

I’ve been working on the sleeves for the dress. The original has short sleeves and I intended from the start to make 3/4 length sleeves. Whicht meant of course drafting those too. I am rather intrigued by the various ways you can draft sleeves. Because of that I took my time and drafted several versions of the sleeve, using 3 different drafting systems: the book Building Patterns  by Suzy Furrer (same as in her classes on Craftsy), Patternmaking for fashion design by  Helen Joseph-Armstrong and the one-piece sleeve from the Dutch Danckaerts system from the book dresses. It’s fascinating to see the different approaches and still coming to a more or less similar sleeve draft. That certainly is true for the methods used by Suzy Furrer and Helen Joseph-Armstrong. The cap of the sleeve drafted by those methods was very similar, the way to get there very different. The Danckaerts system gives a different shape for the back of the sleeve, which I know not to be good on me but I wanted to draft it anyhow to see how it would be compared to the others. In my next post I’ll show pictures of the different pattern pieces and describe the different approaches in more detail.

I made mock-up sleeves of the two versions. On the right is the SF draft and on the left the HJA draft.

DSC_0357

DSC_0360

The HJA draft felt more comfortable. Both had a few unwanted wrinkles.

DSC_0358

This meant (and I had to check my fitting books for that) that the sleeve should be rotated a bit to the front and after I did that, it improved, but I wasn’t there yet. On the photo below I also made the sleeve cap higher (the height from the biceps line where the armhole starts to the top of the sleeve) by basting it with a very narrow seam allowance. This gave a pretty good result and I can move that arm properly. I’m pretty sure that if I had adapted the sleeve drafted with the SF method it would have resulted in a good fitting sleeve too.

DSC_0367

DSC_0369

Though I’m this far in drafting and constructing, I’m in doubt about the dress. When I first saw the picture of it a few years ago I really loved the design and thought it really would be a “me” dress. As it is I’m not so sure. Don’t know whether it’s the fabric or the design on me but I’m not as enthousiastic as I thought I would be. I might leave it alone for a week or so and see what I think.

Thursday, January 26, 2017

Drafting a dress - 3


What lovely comments on my posts on drafting. Based on your comments I will try to give more details on drafting the funnel neckline in another post (if I can do that without infringing copyright) and will show you how I use my sloper to check a pattern. There were other questions and I'll answer these in another post. Never feel that you might not have enough experience to comment or apologise for being late with a comment. No need!! I love to read them all. 

Today two pictures of my progress. The front now stays in place, so the change worked. 


Aweful selfie photos in a mirror, you'll get the idea. The pleats are only provisionally pinned and I will change them a bit before closing the seam. Just wanted to know if I was on the right track. 

On the inside I used silk organza on the bias cut triangle at the waist to stabilize and used a little bit at the right front to eliminate bulk for the zipper in the side seam.