Showing posts with label Ziggi. Show all posts

Thursday, March 20, 2014

Ziggi jacket done

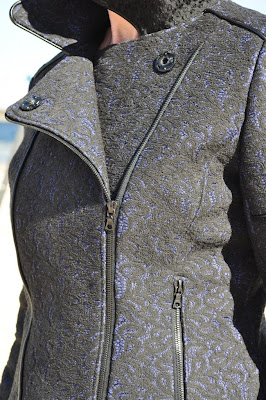
The last steps on the jacket took me a while, but finally I can post pictures of the finished jacket. I totally forgot to take photos from the inside. I’ve used a beautiful black silk for it, that I bought in New York too.

For me this is a souvenir jacket, most of the materials were bought during my stay in NY in October when I met up with Nancy.

This week I’m staying with my friend Valerie for a few days and she did the photos (thank you!). It’s a day with a lot of sunshine and  wind, so the hair got a bit untidy. I think it’s nice to have a different location once in a while to have the pictures taken. We have been sewing together as well. I did a nice new bra, so more sewing news to follow.

I’ve posted quite a bit on the construction process already, so I’ll limit it to the photos now.

It was quite a lot of work to make this jacket, it still has a few fit issues, also resulting from using the thicker fabric. Those things do not hold me back from liking this jacket very, very much. It’s going in the closet for a while because it’s too hot to wear now, but will definitely wear it a lot next winter.

Sunday, March 9, 2014

Ziggi jacket – changes to the pattern

Thank you for your comments on my running.It seems that sewing and running is a combination of activities regularly done. I do plan to make workout gear (e.g. Melissa’s legging pattern is in my to sew list), getting the right fabric is a bit of a problem. I might try to use some swimsuit fabric that’s laying around for a first try of the pattern.

Back to the Ziggi jacket. I hope to finish it tomorrow. Here’s a sneak peak again. I did say in a previous post that it might take me as long as a Chanel style jacket. I didn’t count the hours, but this certainly is a time consuming project.Mostly due to my choices of fabric (all seams have to be catch-stitched to lay flat) and finishing (piping added). Well worth it.

Before I show the changes to the pattern let me say that these changes are for my figure, they are not a mistake in the pattern. I prefered to have more waist definition too.
Combined with the full bust and narrow back figure I have , I made the following changes. Click on the pictures if you want to see them larger.

At the bottom (left side of picture) I came back to the original seam line (pattern is with 3/8 seam allowances), but otherwise took quite a bit of width out of the back, including at the top of the pattern pieces, that are sewn to the yoke.

At the front I took out a bit at the waist too. When sewing I straightened the line a because I realized I had to sew in the pockets/zipper and too strong a curve was not good there. The center front part was not changed.

The yoke was a bit more work. It had to stay the same length in the front, the shoulders and back had to be shorter. In the next picture you see the original pattern to the left and mirrored my new pattern piece. Most obvious is that the armhole part of the yoke (in the center) is more curved in the changed pattern piece.The length is the same.

This is how I changed it.
I drew lines from the shoulder notch to the neckline and a line from front to back seam.

The vertical line was cut from the back till the front seam, and from the edge to the front seam, leaving a little “turning” point. Of course it separated a little after this picture. It’s just important that the seam line is the point you’re working with, not the edge of the seam allowance.

Then the pieces are shifted like this, the front line is not straight any more, but still the same length. The back seam is overlapping, as are the lines at the shoulder. A little bit extra space is added, but I considered that too small to bother about and it was ok.

All pieces taped together again and the seams trued (straightened in this case). The shoulder seam was 11 centimeters and is now 10 centimeters. The back seam of the yoke was 14.5 centimeters and is now 13 centimeters.

If you want to you now adjust the seam allowances too,

Also check the changes to the back pattern pieces. The seams on these parts must together be the same length as the seam of the yoke. The other seams of the yokes are not changed in length.

Tuesday, February 25, 2014

Sleeves

Two commenters have asked for a post on the fitting of this jacket. I’ll come back on that soon. For now it’s about construction.

I like to break up a complicated project as the jacket in manageable pieces. Sunday I didn’t have a lot of time and I added only the horizontal piping in the sleeve. Tonight was planned for inserting the sleeve zippers Shams did a great post on how she did it and I read it thoroughly before starting. It was quite similar to what I had in mind, but it doesn’t hurt to get it confirmed. I’m not sure yet whether I’ll add the gusset, sewing is done for tonight, I’ll decide tomorrow.

Originally I planned to to a vertical piping as well till the start of the zipper but have decided against it. I had pinned it and then thought it was giving too much bulk. I did not want to take the risk and omitted it. Don’t think it will matter in the end result.

The zippers I bought in NY too , they are Riri zippers. There is no choice in zippers where I live, it was such a jaw dropping experience when I first saw a shop (Pacific trim) full of all kind of zippers on my first visit a few years back. They are made to measure too, while you wait or shop around a little. Great service. I bought one very long zipper and they made it into one long and 4 short zippers.

Here’s the series of photos of my construction.

Measuring the length of the zipper, like Shams I decided I wanted the pull of the zipper not below the hemline of the sleeve.

Then I measured the width I wanted exposed and chalk-marked these measurments on a piece of silk organza.

Pinned the silk organza to the right side of the fabric at the seam line

Stitched NOT on the seamline and to the corner with very small stitches. The small stitches prevent any gaping/fraying of fabric in the corner. Not really an issue in this felted wool, but also the organza must not ravel.

Clipped and turned, than basted.

Under and upper sleeve stitched together.

And finally the zipper sewn into the ‘window’

Saturday, February 22, 2014

Jacket back and a quick t-shirt

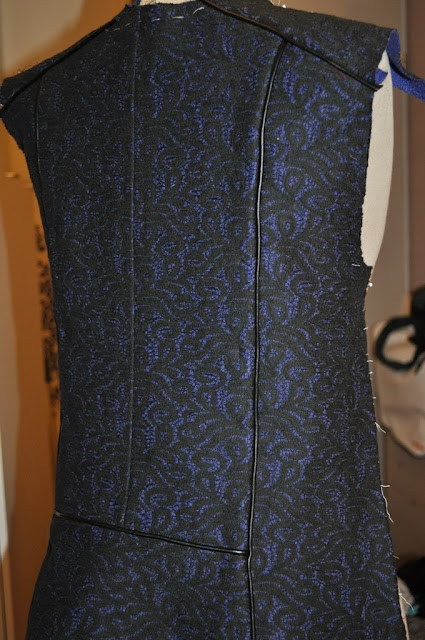
Most of the work on the back is done. One side still needs catch stitching of the seams. This fabric is a bit thick so it’s also about reducing bulk and keeping the seams flat. The flash light makes the piping shine a bit more than in real life. I’m beginning to feel this jacket might take as many hours as the classic Chanel jacket….

In between I made this cowl neck top. It’s the Day to night top from Maria Denmark. I made this top twice last year, don’t remember blogging about it. It’s an easy top to make. It took me about an hour and a half, including adding the sleeves from the Birgitte top. Both are good basics. I haven’t made the Birgitte top yet, I like the wider neckline of that one. A cowl neck is always good in my eyes. These patterns are pdf patterns, quick delivery. I still am not sold on the format of the pdf patterns. I still would prefer to have the printed pattern, or at least the option to have it as a printed pattern. For these relatively non complicated tops I didn’t mind.

Friday, February 21, 2014

A quick update

SewMaris (who’s starting a sew along vor the Ziggi jacket soon) asked in a comment which size of the jacket I ordered. I bought a size 12 by bust measurement. The size 12 in StyleArc size chart gives a bust measurement that is 2 cm smaller than my actual bust measurement. It was fine for the Marie and Marni jacket, on the Marni jacket I did an FBA. For this jacket it was far too wide in the back, though total bust circumference was fine. A common problem for me, as you’ve seen my muslins in the past few months that really is a problem challenging area for me. StyleArc patterns are in one size (like the Italian Marfy). My body has 3 different sizes comparing bust, waist and hips. On multisize patterns it’s easier to grade between sizes.

I’m getting there though (thanks to the sewing teacher). This is the jacket provisionally sewn with long stitches, sleeves not pressed.

It will be taken apart again as it has to be interfaced, zippers inserted etc. Step by step I will get there (doing some easy things in between). I’ll be posting about the steps taken.