Thank you for your comments on my running.It seems that sewing and running is a combination of activities regularly done. I do plan to make workout gear (e.g. Melissa’s legging pattern is in my to sew list), getting the right fabric is a bit of a problem. I might try to use some swimsuit fabric that’s laying around for a first try of the pattern.
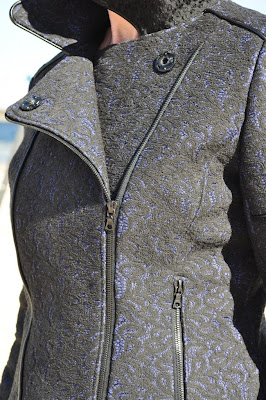
Back to the Ziggi jacket. I hope to finish it tomorrow. Here’s a sneak peak again. I did say in a previous post that it might take me as long as a Chanel style jacket. I didn’t count the hours, but this certainly is a time consuming project.Mostly due to my choices of fabric (all seams have to be catch-stitched to lay flat) and finishing (piping added). Well worth it.

Before I show the changes to the pattern let me say that these changes are for my figure, they are not a mistake in the pattern. I prefered to have more waist definition too.
Combined with the full bust and narrow back figure I have , I made the following changes. Click on the pictures if you want to see them larger.
At the bottom (left side of picture) I came back to the original seam line (pattern is with 3/8 seam allowances), but otherwise took quite a bit of width out of the back, including at the top of the pattern pieces, that are sewn to the yoke.


At the front I took out a bit at the waist too. When sewing I straightened the line a because I realized I had to sew in the pockets/zipper and too strong a curve was not good there. The center front part was not changed.
 ‘
‘
The yoke was a bit more work. It had to stay the same length in the front, the shoulders and back had to be shorter. In the next picture you see the original pattern to the left and mirrored my new pattern piece. Most obvious is that the armhole part of the yoke (in the center) is more curved in the changed pattern piece.The length is the same.

This is how I changed it.
I drew lines from the shoulder notch to the neckline and a line from front to back seam.

The vertical line was cut from the back till the front seam, and from the edge to the front seam, leaving a little “turning” point. Of course it separated a little after this picture. It’s just important that the seam line is the point you’re working with, not the edge of the seam allowance.

Then the pieces are shifted like this, the front line is not straight any more, but still the same length. The back seam is overlapping, as are the lines at the shoulder. A little bit extra space is added, but I considered that too small to bother about and it was ok.

All pieces taped together again and the seams trued (straightened in this case). The shoulder seam was 11 centimeters and is now 10 centimeters. The back seam of the yoke was 14.5 centimeters and is now 13 centimeters.

If you want to you now adjust the seam allowances too,
Also check the changes to the back pattern pieces. The seams on these parts must together be the same length as the seam of the yoke. The other seams of the yokes are not changed in length.


