A welt for a pocket! It makes for bulk free edges. I’ll write a post on how I did this later.
Wednesday, April 18, 2018


Tuesday, April 17, 2018
A riddle
To do something different I have a picture for you of a pattern piece, cut out in fabric.

Without further information, can you guess what this is?
Tuesday, April 10, 2018
Production sewing
Well, despite all good intentions my jacket is still unlined. I made some progress, the lining is cut, pinned together to sew as much seams at once as I can. It isn’t that much fun to sew lining, don’t you think? In the meantime I felt an urgency to update my spring/summer wardrobe. I’m absolutely lacking linen pants and could use a few new tops as well. Summer dresses too, but well, it isn’t summer yet.
So I made a plan to get my closet updated. Which means more not too interesting sewing. I’ve sewn a light grey pair of linen pants and a dark blue t-shirt to go with the jacket.

Last weekend I’ve cut 5 garments, marked and interfaced where necessary and just started sewing. The pair of pants below is the first garment of those 5 that’s finished. The pattern of the pants below is the same as the one above. I just changed the shape of the pockets, made the waistband smaller and added more topstitching and belt loops. Different weave of the fabric makes for a different look too.
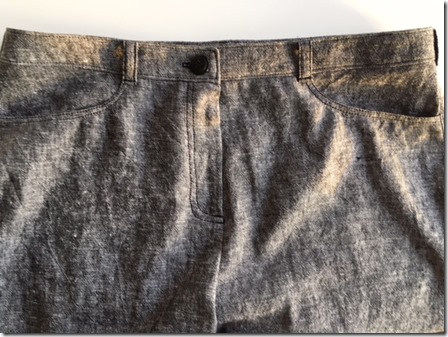

In 2016 I used this Burda pattern and was quite happy with the fit. Only the angled pockets are not good on my figure and the legs were very wide. I still have the pair that I made and concluded that it was good to use if I only changed those features. The result is a pattern I can use many times.
In my sewing queue is another pair of linen pants, two skirts and a blouse. I’m challenging myself to finish those within 2 weeks. Might be a bit ambitious.
Saturday, March 17, 2018
The difference a shoulderpad makes
I’m working on a spring jacket. This time I’m not using many tailoring techniques I wanted to make a “quick” jacket, to be combined with a few other items, still to be sewn.
The pattern is Vogue 1439. Out of print but still sold at Vogue patterns.

This picture from the Vogue website shows the jacket worn with a cowl neck top, not a good choice for this style jacket. Not a very flattering photo.
My fabric is totally different and not showing the design lines as well. I will go into more details on the pattern and what I changed in another post but wanted to show you the difference a shoulderpad makes.
In the first picture the sleeve on the right hand side (picture left) has a shoulderpad pinned to it, the other not.

A few minutes later, the other shoulderpad is pinned too. Can you see that it lifts a bit and als stabilizes the front? I interfaced the front pattern pieces, but did not make a shoulder shield as I mostly do in jackets. But I did add sleeveheads and shoulderpads as I think it hugely improves the appearance of a jacket.
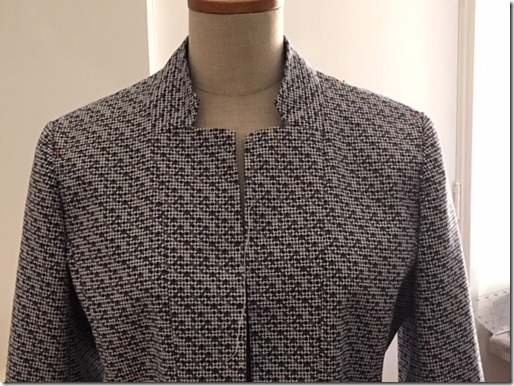
It’s a rather close fitting jacket on me, only suitable to wear with a simple t-shirt or camisole, but that’s fine. I hope to finish this jacket very soon.
The pattern is Vogue 1439. Out of print but still sold at Vogue patterns.
This picture from the Vogue website shows the jacket worn with a cowl neck top, not a good choice for this style jacket. Not a very flattering photo.
My fabric is totally different and not showing the design lines as well. I will go into more details on the pattern and what I changed in another post but wanted to show you the difference a shoulderpad makes.
In the first picture the sleeve on the right hand side (picture left) has a shoulderpad pinned to it, the other not.
A few minutes later, the other shoulderpad is pinned too. Can you see that it lifts a bit and als stabilizes the front? I interfaced the front pattern pieces, but did not make a shoulder shield as I mostly do in jackets. But I did add sleeveheads and shoulderpads as I think it hugely improves the appearance of a jacket.
It’s a rather close fitting jacket on me, only suitable to wear with a simple t-shirt or camisole, but that’s fine. I hope to finish this jacket very soon.
Saturday, February 24, 2018
Border print
This fabric is a fabric that caught my eye, ordered it and made it up within two weeks. I made the dress for a dinner I had with friends on the occasion of my birthday. I finished it the evening before the event, which was lovely, but then the flu got hold of me. Nasty flu, been years since it got hold of me but this time it was my turn apparently. Haven’t sewn a stitch in two weeks, but now the energy is coming back. Time to show you the dress.
This border fabric was sold by panel, only 1.20 meter long. Which is not a lot to make a dress for someone with my height. It worked, though I had to cut the facings with a seam.
The pattern is based on my Suzy Furrer sloper, combined with a neckline that was inspired by New Look 6184. Thanks Viv for suggesting this neckline!

I don’t have this pattern but it was easy enough to rotate the shoulder, armhole and bust dart to these neckline darts. I left the waist darts in place, as that’s better with my figure.


Pictures from the zipper and lining. All done by machine with good result. The front and back of the dress were sewn first, leaving the shoulder seams and part of the neckline open. I love this way of construction, which I learned in Sara Alm’s class on facings.


Saturday, February 10, 2018
Twist detail
Twists in garments have been around quite a while now. I believe it started with a famous Burda top in 2004 and I made my share of garments with a twist. Not very many, maybe 2 or 3. Now I did two in a row. This post is about a StyleArc pattern: the Sadie top.
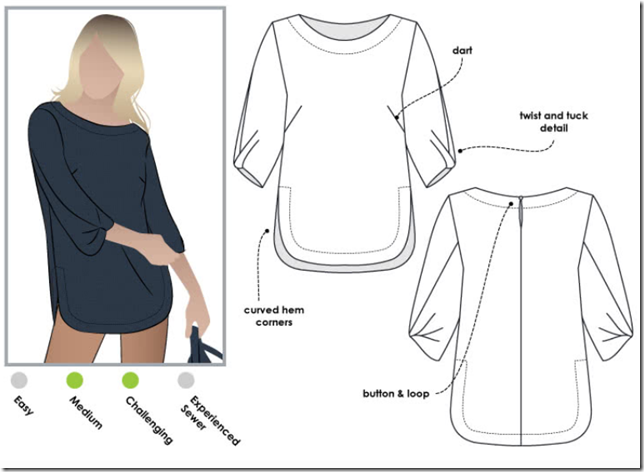
This time the twist is not in the bodice but in the sleeve. A detail I immediately loved and wanted to try. I don’t know when this pattern was released, but I only noticed it a couple of weeks ago. I ordered the pdf pattern and one thing I noticed was that the front was not a complete pattern but half, to be cut on the fold. It’s been one of my little irritations that StyleArc used complete patterns when you could just as well cut the pattern piece on the fold. It saves a lot of paper and it also means less tracing/taping of the pages. Hope they do it for all patterns now. Great improvement!
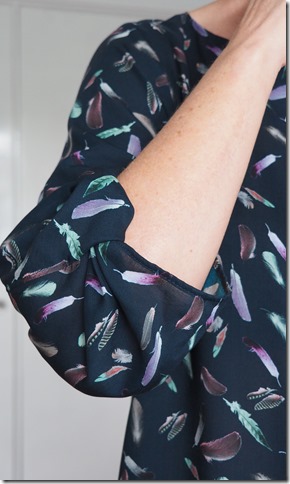
The sleeve detail is really nice. You definitely need a thin fabric with good drape for this. My fabric is a viscose (rayon) and perfect for it.
It’s a loose fitting top, can easily be worn over a pair of trousers like in the photos of me wearing it, but it’s also very good tucked in.


The pattern is labeled as medium/challenging and the sleeve isn’t for beginners. The rest of the pattern is easy.
I’ll try to illustrate my take on sewing the sleeve. Photos taken with my phone in the evening, not the best.
My first step was serging all seams, without cutting any fabric off, so that the seam allowances remained.

The hem of the sleeve must be finished till the notch on the pattern. I folded the serged hem twice and stitched it (stitching not in photo)
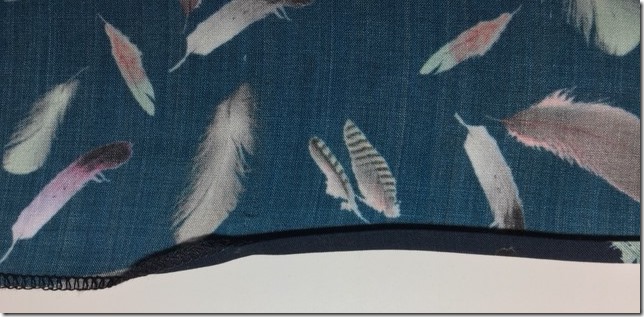
In the curve I used the same approach. The advantage to me was there is no clipping of seams this way, which might make for holes or fraying of fabric.
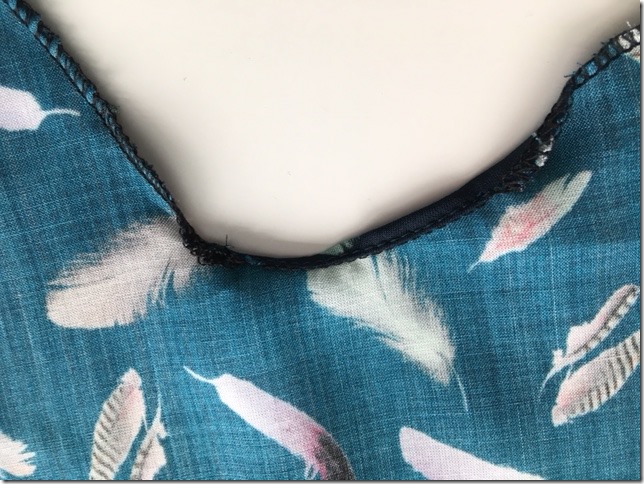
After twisting as in the illustration in the instructions it looks like this:

The seam is sewn till the twist and then it’s almost a sleeve like any other sleeve. Stitch the sleeve seam and insert in the bodice.
Sunday, February 4, 2018
When you don’t do things as you advice
A while ago I wrote a post on hemming knits with a coverstitch, showing a way in which a row of basting thread helps you to stitch accurately. Definitely a method I recommend and I do it that way most of the time. Last week though I was a bit in a hurry to finish a dress and thought I could wing it. The reason I thought this was that the fabric was very stable, with no tendency to wrinkle or distort.
Well, it didn’t happen as I hoped. Most of it went right, but there was about 20 centimeters of a loose hem.

For the rest it was a nice hem and I didn’t feel like undoing the stitching (do you know that feeling that when you don’t want to unpick a coverstitch hem comes out very easily, when you want to unpick it takes forever?).
A piece of hemming tape was the solution. I cut away a bit of one side to make the stitching on the tape closer to my hem.
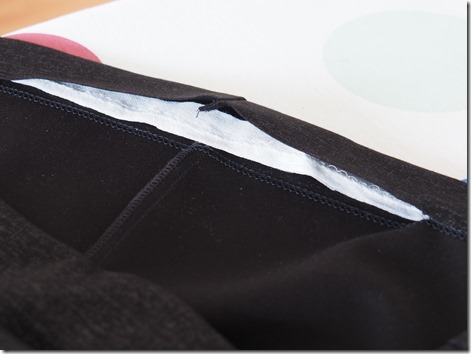
Ironed it and my hem was done, with great stitching on the front. Nobody will be the wiser seeing this dress.


The resulting dress, Vogue 8946, which I made more than 3 years ago in a print. It was a dress I loved to wear, but had reached the end of its life cycle. For this version I lowered the neckline a tiny bit and brought the shoulders a bit more in to the neckline. I made more photos but it’s ever so difficult to get good photos of this black fabric.
Subscribe to:
Posts (Atom)