Thursday, December 29, 2016

Burda dress

Hope you all had a lovely Christmas if you celebrate it. If not hope you had a lovely weekend.

DSC_0288

I finished my dress before Christmas and wore it to the Christmas dinner with my family. It was a rather quick project. A friend mentioned a Downton Abbey vibe to it and though I can see it I think (hope) it’s a bit more modern.

image  image

The pattern is from BurdaStyle January 2016, nr 117. Mine looks pretty much like the photo for once, as I made it from a dark navy fabric. Don’t remember where I bought it and think it’s a cotton/linen blend with perhaps some silk in it, as it has a lovely shine. A bit cool for a winter dress (I wore it with a shawl for dinner), but I found out that most fabrics in my fabric collection are not dress length, certainly not when the dress has a flared skirt and sleeves. And one of my goals for the next few months is also to use more of the fabrics I have. Not committing to anything, just thinking that as I have some really nice pieces it might be good to use them.

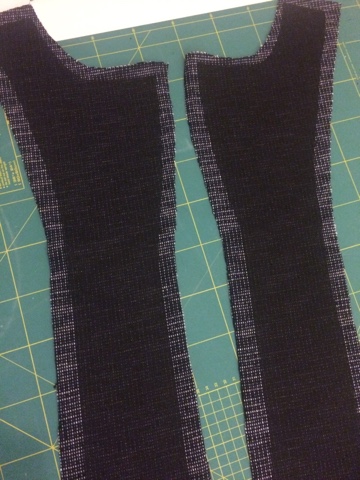
The sleeves are cut on the bias and are comfortable in wearing. I do remember reading somewhere that there might be a problem with sleeves cut on the bias, but for this fabric/pattern it was no problem. 

DSC_0289

The pleats are a separate pattern piece that is cut off-grain. This helps the pleats to curve around the body.

All I changed to the pattern was adding 7-8 centimeters to the center front and adding 3 cm to the length of the bodice, which is what I usually do with Burda patterns. I checked the pattern pieces to my sloper and it was quite close to that.

Two pictures of me wearing the dress. These were intended as trial ones but the camera battery went down and I don’t feel like doing it again later.

DSC_0296 

DSC_0294

A few dressform pictures of details.

DSC_0293DSC_0290

Have a lovely new year’s evening all and a joyful start in the new year. Till next year!

Thursday, December 22, 2016

Burda challenge - organizing

Planning to do the one Burda pattern a month challenge has already resulted in a garment and some organizing. I made a dress from the January 2016 issue for which only the hemming still needs to be done. Should manage that before Christmas, don't you think? 

During the two house moves my magazines had gotten a bit disorganized and I wanted to have them by month together. I took out all that I could find and made a little pile per month. 

Then I counted and while I thought there would be about 50, there are 92! that's only Burda, not Knip mode, Ottobre or Patrones. I have quite a few of those as well. Some issues are well used but it is certainly a good idea to use them more. 

Wednesday, December 21, 2016

A challenge without rules and a pattern tracing tip

On Pattern Review there’s a thread with a challenge to use your (Burda) magazines more. In 2017 this challenge is held for the 3rd time and this time I will try it too. Especially as there are no fixed rules. Some want to make a garment from each issue that will be published next year, some want to make 6 garments, some using older issues as well. It’s your own challenge. I’m in the last group. I have so many issues of pattern magazines, not only Burda. Many patterns marked to make some day, but you all know what happens.

Even though I make more of my own patterns now, it’s still nice to have a pattern as a starting point sometimes, or even just use a pattern. Therefor I will try to make at least 12 garments next year using Burda patterns, either from 2017 issues or older issues I have. I made a good start by tracing and cutting a dress today. Whether it’s finished before Christmas remains to be seen.

Have you ever tried Burda magazine patterns? Here’s a tip for those of you who find the pattern sheets intimidating and have difficulty to find the pieces in all the lines.

First you start with the sheet (A, B, C etc) you need and find out what color lines you have to trace. This information you can find with the pattern instructions in the center of the magazine.

The numbers are not only printed next to a line of the pattern piece, but also in the margin of the sheet. The easiest way to find a pattern piece that isn’t too obvious is locate the number in the margin, in the color you need, and trace a (mental) line perpendicular to that number over the sheet. Somewhere along that line will be the pattern piece number you are looking for. Sometimes it’s close to the number in the margin, sometimes on the other side of the sheet, but always in a straight line from the number in the margin.

image

image

Sunday, December 18, 2016

Taking forever

IMG_4296

That’s how it felt like, it’s not that difficult a jacket and making it much less structured than I would normally do even makes it an relatively easy project. But having our bathroom done meant more than just having no bathroom (yeah for not having to go to the gym for a shower anymore!). I really wanted to finish the coat and accepted the tools of the builders being in my sewing room too. After the coat I was just not in the mood to sew a lot in a limited, messy (especially as it was not my mess) space. Started the jacket and then just knitted more instead of sewing.

But… the collar is done and I do plan to finish it this week, unless I decide to sew me a dress before Christmas, which is sort of in my head but still undecided.

Friday, December 2, 2016

An unstructured jacket (more or less)

On my sewing list is a jacket inspired by one I saw a few months ago. It was in a shop and I have no pictures of it, nor do I remember the brand. It was unlined, didn't have a lot of structure and was from a knit fabric. 
My fabric is a knit too and I'm using minimal structure/interfacing. It's an experiment, I am inclined to add more but want to see whether it will work to create a jacket that will feel more like a cardigan, without being the famous Chanel style. 
This is what I have done:
stay tape in shoulder and neckline
Fusible interfacing for the front facing. 
Lapel and roll line
The under collar. I fused the interfacing over the piece of hair canvas to ger a roll line. 

I did not interface the front or make a shoulder stay. While working on it I'll decide where to add more (probably the hem at least). 
Cut longer than usual, might shorten it. 

Thank you all for the nice comments on my coat. Loved to read them all. 

Wednesday, November 30, 2016

The coat revealed

Without further ado, here is my coat. Awefully difficult to photograph. I made most of the photos lighter to show some details, but still hard to see.

DSC_1218  DSC_1231 

DSC_1228DSC_1222

I’m quite impressed by the fit of this coat. The only thing I changed was to take in a little at the center back seam at waist level, I made no other changes. I indicated that I wanted my sleeves longer and they are the perfect length.

As the instructions are not helpful I would not recommend this pattern if you don’t have a lot of experience in jacket or coat making, but if you have it’s a great pattern. Remember to check the pocket position if you’re not tall (as I said in a previous post they were much too low for my friend’s coat originally).

The extra layer for warmth is wonderful, it started freezing here and I’ve worn it already. Very, very comfortable.

My next project will be a bit less complicated (I think).

Tuesday, November 29, 2016

Pocket with flap in seam

Don’t know how to call it but that’s what it is: a pocket with flap in a seam:

IMG_4140

I wanted to topstitch it, preferably in one continuous line. This means that the pocket must not be completed fully, otherwise you would close the pocket while topstitching. Below how I did this.

  • Sew the pocket flap and attach the pocket lining to it. This is the side of the pocket that will be to the wrong side of the front coat when finished. I used one layer of fabric and one layer of lining for my flap, as the fabric was thick. I topstitched with special thread in a long straight stitch. I used length 4, a lot of the length disappears in the fabric layers.
  • Mark the stitching line on the right side of the pattern piece. I used tailors chalk for this (I did not cut exact seam allowances thereofr the line is not at the same distance from the edge, I marked all seamlines on the inside).


IMG_4124

  • Sew the flap to the front, right sides together, from the exact edge of the flap to the other edge, the pocket pointing outwards.

IMG_4126

  • On the side panel I sewed the other pocket piece, within the seam allowance, which is indicated by the chalk line.

IMG_4128

  • Then stitch the front and side panel together, stopping where the pocket flap starts and continuing below it.

IMG_4129

  • Press the seam open and make sure the pocket pieces are out of the way. The front panel can now be topstitched without sewing in the pocket pieces.

IMG_4131

  • Fold the pocket pieces together and sew them together. Because you sew the pocket part that’s sewn to the side panel not exactly on the seam line the two pockets will not align exactly. For me that’s never a problem, I just make sure the two pieces are nicely flat, pin together and sew the pocket.

DSC_2203

The result is a nice pocket with continuous topstitching lines.

IMG_4136

----------------

My coat is finished and worn already, it started freezing here, so it is just in time.Very comfortable and warm! I will make proper photos of it (hopefully tomorrow).