Showing posts with label Top/blouse. Show all posts

Friday, July 13, 2018

Summer!

July already. It’s hot and dry in our country for weeks on end. Very uncommon. It gives the nice summer feeling though and a lot to do in the garden and my allotment too. It takes some time to water it all, not all plants thrive as they would normally, others do much better. I’m already picking the loveliest tomatoes from our plot (there’s a greenhouse where I grow them) and looking forward to tasting a few special varieties that need a bit more time. But hey, that’s not what you’re reading my blog for. I’ve been sewing a little too.

An update on the Burda dress from the June issue I started before my holiday: I didn’t like the baby blue on me and it’s been laying around for weeks. As I write this it’s in the washing machine after having dyed the partial constructed dress. If I like the result I will finish it, otherwise it will be the bin.

The blouse I show today is a pattern I’ve used very often before. It’s an adapted Ottobre pattern that I like for summer. This fabric is very fluid, which makes the neckline a bit too deep for everyday wearing. Must remember to adapt the pattern.

I call this my “crazy fabric” as it’s totally not my normal style. Something I do sometimes for summer tops, not on purpose, but I made this top in a “not me” print several years ago too.

P7011580P7011579

The fabric has a visual illusion: it looks like tucks but it’s all printed. Several people have thought it was a special sewing treatment by me: none at all!

Saturday, February 10, 2018

Twist detail

Twists in garments have been around quite a while now. I believe it started with a famous Burda top in 2004 and I made my share of garments with a twist. Not very many, maybe 2 or 3. Now I did two in a row. This post is about a StyleArc pattern: the Sadie top.

image

This time the twist is not in the bodice but in the sleeve. A detail I immediately loved and wanted to try. I don’t know when this pattern was released, but I only noticed it a couple of weeks ago. I ordered the pdf pattern and one thing I noticed was that the front was not a complete pattern but half, to be cut on the fold. It’s been one of my little irritations that StyleArc used complete patterns when you could just as well cut the pattern piece on the fold. It saves a lot of paper and it also means less tracing/taping of the pages. Hope they do it for all patterns now. Great improvement!

Sadie sleeve detail

The sleeve detail is really nice. You definitely need a thin fabric with good drape for this. My fabric is a viscose (rayon) and perfect for it.

It’s a loose fitting top, can easily be worn over a pair of trousers like in the photos of me wearing it, but it’s also very good tucked in.

Sadie topSadie back

The pattern is labeled as medium/challenging and the sleeve isn’t for beginners. The rest of the pattern is easy.

I’ll try to illustrate my take on sewing the sleeve. Photos taken with my phone in the evening, not the best.

My first step was serging all seams, without cutting any fabric off, so that the seam allowances remained.

IMG_0300

The hem of the sleeve must be finished till the notch on the pattern. I folded the serged hem twice and stitched it (stitching not in photo)

IMG_0304

In the curve I used the same approach. The advantage to me was there is no clipping of seams this way, which might make for holes or fraying of fabric.

IMG_0308

After twisting as in the illustration in the instructions it looks like this:

IMG_0312

The seam is sewn till the twist and then it’s almost a sleeve like any other sleeve. Stitch the sleeve seam and insert in the bodice.

Tuesday, October 17, 2017

A drafting experiment

The dress I made was cut on the bias and as a result I had a bit of fabric left. It inspired me to sew this top as experiment for rotating darts out to the neckline and create tucks. It’s a style I don’t use as in commercial patterns there is usually so much ease around the bust added that I I feel it makes me look huge. Still I wanted to try this. The result is better than I hoped because no extra ease is added at bust height. Not the very best style on me but wearable.

IMG_5841 (002)

PA170984

PA170982

I made the shoulder seam with the instructions from Sara Alm’s Craftsy class Facings and linings. Very neat method. Definitely a good alternative to the way I used before.

PA170986

For those interested the pattern drafting phases. The shoulder, armhole and bust dart are rotated out, creating space at the new tuck lines.

IMG_5819

IMG_5821

IMG_5822IMG_5823

In the end I did not sew the waist dart.

To conclude a first picture of my next project. Pattern pieces cut and block-fused. It’s a souvenir fabric I bought a few years ago in New York. At the time I thought I would make a Chanel-style jacket of it, but I’m not really wanting one any more. It will be a short coat. More on that later.

PA170979

Thursday, September 21, 2017

A blouse with dots

I showed pictures of my work in progress last week. All three projects are finished, my daughters dress has already left the house (in the form of her wearing it before I had a chance to take photos).

image

Let’s focus on the blouse for this post. It’s a nice pattern, Burda 6632. To my surprise it was very long and very wide, I took off a bit while normally I have to add length. I didn’t change the length of the sleeves either.

A more major change was made to the placket. The pattern has only buttons as decoration element, they’re not functional and there’s a seam at center front, no overlap. I wanted to have a placket which overlaps and using buttonholes. Not very difficult, but somehow it took me a while to grasp what and where I had to change.

The fabric was, as I said already, very difficult to work with and I used starch to keep it from slipping away continuously. I was asked what I use and it’s a spray starch that’s sold here in the supermarket. On the bottle it says it’s to make ironing easier and giving it a bit more stability (the starch). For me this little amount of starch was enough to help me in construction.

image

The photos of me wearing the blouse. As so often, Burda’s neckline is deep, this blouse requires a camisole.

P9210835P9210836P9210842P9210840

Wednesday, February 22, 2017

Top finished

The top I drafted is made up in fashion fabric. A remnant piece that I found at the fabric market last year. Did not know the contents but as it was a “Sigrid” fabric (as one of my friends immediately said when I showed the picture in our Whatsapp group) I had to buy it.

It was not complicated to draft and an easy make too. Only the point of the v-neckline requires some thought and I might do it a little different next time. There certainly will be a next time as I like the neckline a lot. The pleat is not something I will repeat too often, but it’s a nice detail.

32952062256_0368f3e099_z

32967275626_95d911a915_z

This was the original inspiration garment.

image

PS: thanks to those who commented on keeping a diary of my allotment plans a few posts ago. I’m experimenting with OneNote and an (old-fashioned?) paper notebook. It crossed my mind to start a blog about it too, but I’m such a beginner. Plus the time it takes. Might change my mind.

Perhaps I’ll do a closing picture occassionally like this, my tomato seedlings and part of the plot (after some work has been done).

IMG_4764

image

Wednesday, February 15, 2017

Drafting (again)

When a pattern you draft does not give the result you want, you may get discouraged and think “why draft, I’ll use and change commercial patterns”. That’s what happens to me, until I realize that I have lots of fitting problems then too or when a garment comes along that I want to copy urgently. That’s what happened when I saw this thread on PatternReview discussing this top (which costs $ 400! I’ll never spend that much on a top):

imageimage

Quite simple looking, yet elegant. Very much a summer top, but also wearable under a jacket. Couldn’t help myself and tried to draft it. This is my muslin, based on my sloper drafted in Suzy Furrer’s Craftsy class.

IMG_4672IMG_4673

In her class on neckline variations Suzy Furrer shows how to draft a funnel neckline and an opera neckline but both in variations that stand away from the neck. I could use the information to draft this neckline hugging version.

My observations:

  • funnel neckline close to the neck
  • curved v-neck
  • 1 to 2 inched seam below lowest point of v-neckline, opening into a small pleat
  • seam in the back neckline
  • center back seam
  • no darts

For my version I chose to have a bust dart: removing all darts in the waist dart is too much on my figure and I think that being full busted that is just fitting better. I did not use a seam in the back neckline.

Hope the next drawings are clear in how I got to this pattern. I use inches in this description as I’m quite used to doing those now, having followed so many of Suzy Furrer’s classes. I use an inch ruler too when I do these markings.

The starting point: sloper draft of the front, shoulder and armhole dart closed and the space “dumped” into the bust dart. (alternative could be a blouse/shirt pattern with not too much ease).

IMG_4703

I went 1/4 inch in for the shoulder seam
(for those having done this sloper too: this is the 1/4 inch you remove from the moulage to get extra space around the neckline. I started using this point but it was too wide, so I went back to the original moulage point)

IMG_4704

From that shoulder point 1 1/4 inch up, perpendicular to the center front

Draw the curve, ending around the middle of the shoulder seam.

Decide where you want the v-neckline to end and draw a curved line to that point.

IMG_4705

IMG_4706

I decided to have the center seam 1/2 inch below the bust line. If the pleat would start too high, it would open up which at bust level, not so nice probably. The pleat is 1 inch deep (you could make it less or more, it’s just what I thought would be about right), so the amount of fabric for the pleat is 2 inches. The front can be cut on the fold. As I’m used to I marked the darts as “not using them”.

IMG_4708

As last step I removed 3/4 inch from the shoulder width.

IMG_4709

The back: starting point the sloper again.

IMG_4710

Basically this is the same change: 1/4 inch into the neckline, 1 1/4 inch up, draft the curve and the neckline.

Remove 3/4 inch from the shoulder width and center the back dart again (I prefer to keep this dart too for better fit).

IMG_4711

The final pattern pieces. The orange dotted line is the line for facings. For the back I will remove the dart from the facing by folding it away. Or I could change my mind and make separate facings for neckline and armhole. First to decide which fabric to use for the top.

IMG_4713

NB: I folded out a little bit (about 1/2 inch) from the curved neckline to make sure the neckline doesn’t gape. This is more necessary for fuller busted women if I remember it right.

IMG_4714

Hope this helps some of you interested in drafting in general or this top specifically. It’s my interpretation of doing this. If you do this I do advice to make a muslin as I’m not a teacher and can’t guarantee this works for you too.

Monday, September 14, 2015

Miscellaneous tops

I’ve been sewing more than blogging, the way it goes from time to time. I’m working on new pants which I’ve drafted myself, more on that in a separate post. This post is mainly about the tops I made.

First this BurdaStyle top which is double layered. I had this fabric around which is a bit sheer on its own. I made the blouse of Vogue 1440 early summer, never got round to do a blog post about that one, but learned that it was too sheer to wear without underlayer. So this top was the perfect choice for it. Actually it was the pdf pattern I traced in my previous post, I did not have the issue it was published in (July 2013).  It’s a nice basic for summer, will have to stay in the closet for a while now as it’s getting chillier here.

BurdaStyle twist shoulderimage

Couldn’t be more basic, a white top based on an Ottobre pattern. Meant to be worn under a jacket or cardigan. I changed the neckline and made it deeper. Initially I made the neckline band using the technique shown in this video by Sarah Veblen. It’s a good technique in general but did not work for me this time. Probably because I stretched too much. In the end I measured the circumference of the neckline on the pattern and subtracting 20% for the length of the neckline band. Worked perfectly.

Ottobre

The Presto top by SavageCoco is very popular at the moment  and I jumped on the bandwagon. A lovely top. The inside finishing is very neat. The construction is described well, just do as instructed and you get a perfect finish of the neckline/shoulder area. I’m not often using the so called “Indie patterns”, often they are too expensive and/or too basic for my liking but this top was very reasonably priced ($4.99). Combined with the positive reviews on it, it was worth trying.

Presto top

I sewed a medium size and it turned out to be too tight. Too much negative ease for my liking. But the fabric is sooo nice and soft that I hated to throw it away. It fitted my daughter very well, but she didn’t like it. As this will mostly be worn under a jacket or cardigan too I added a strip of fabric to the side. It goes from the hem at the bottom in one long strip to the sleeves too, as these were very tight as well. Next time I’ll trace the large size.

Extra strip Presto top

The last one I made yesterday, it’s StyleArc’s Gail top. After making this photo I hemmed it and am wearing it today, casual with a nice twist. The fabric was bought a few years ago and all the time I did not know which top I would make from it. Then I thought about this variation and I quite like it. I’m going to do some work on the pattern for my next iteration: take out a bit in the center front waist area and have the neckline cross a bit higher. Both are figure related problems, not a pattern fault. Though StyleArc’s instructions are confusing. One sentence says “sew together”, the next one “join together”. I was thinking I had to do something else than sewing together in the last instruction. Could be my English but it was confusing me. And as construction is not that obvious, I was referring to and needing the instructions. They could do better on that.

StyleArc Gail image

Three of these four tops were pdf patterns that I traced using the method described in my previous post. I really like to do it that way.

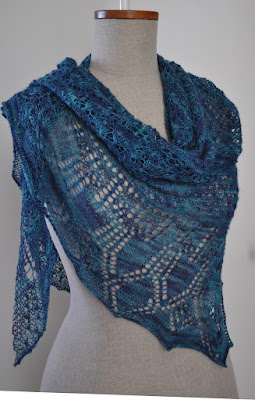
And to finish off for today (mainly for my own reference): another shawl finished: