The feedback on my Patrones top is one of the reasons I like the sewing community on the internet! Thank you for your comments and inspiring me to try the Sorbetto pattern. The Patrones top indeed needed too much alterations and was not basic enough to give it another try. (Mici, your suggestion of a TNT pattern and changing that is very true, only I just don’t have a TNT top pattern).
I had seen the Sorbetto pattern being made very often by other bloggers and reviewers, but discarded it because I just don’t like the printing, putting together of all the sheets and tracing again. So I just didn’t think of it as a possibility any more. Wrong! Today I downloaded the pattern, printed the page with the test square first (no scaling should be on in the printer settings) and when that was the correct size right away, I printed and taped the pattern together.
Certainly not something I like and won’t do for a pattern that I have to pay for. Then I want a magazine sheet to trace or an envelope with the complete pattern in it. But this pattern is FREE! No complaints then on the download format.
After reading some of the reviews on Pattern Review, I traced size 10 by bust measurement (size 10? I’m a size 14/16 for Vogue patterns!), tapering to 12 at hip height, which I later removed again.
Also I made the dart shorter, which I think is better, as it would have gone far too much to the front if I had kept it the way it was.
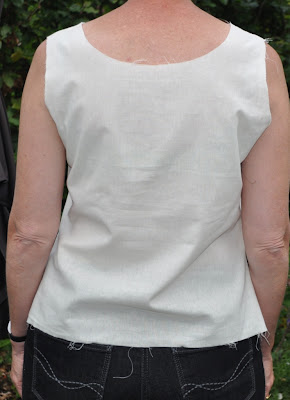
This is the result of my muslin, with a seam center front because of lack of muslin fabric.
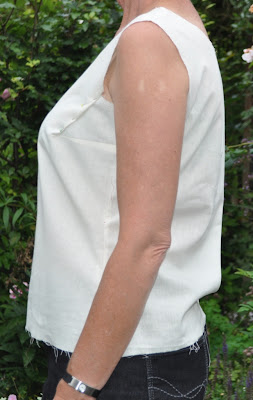

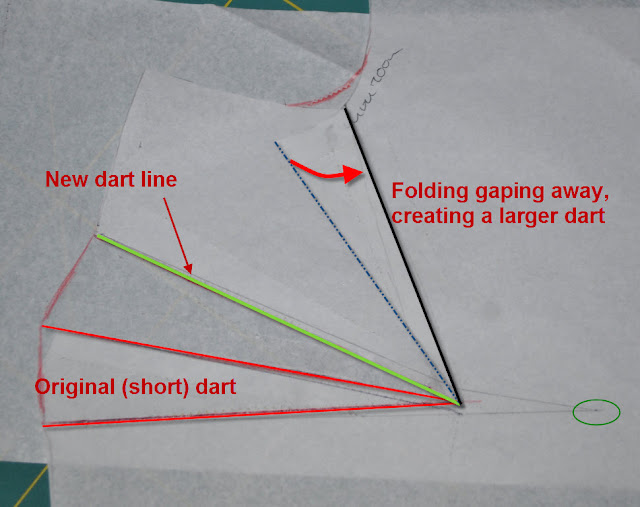
As you can see in the side view, I’ve pinned some gaping away. That’s all I changed and this is how I transfered the change to the pattern:
Marked the fold with lines over it
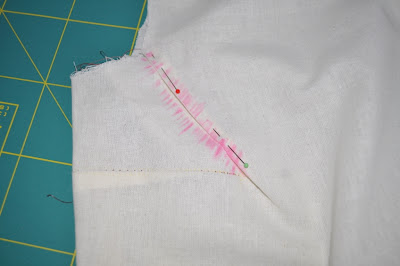
Folded it out, now you can see how much fabric must be taken in. This method of marking I saw in a Threads issue in an article by Kenneth King.
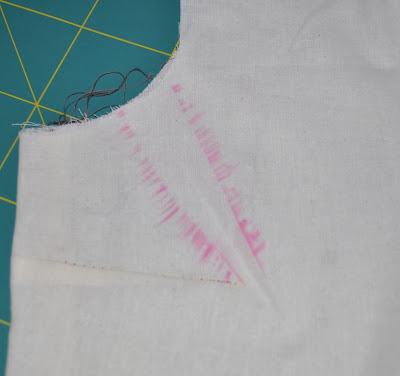
Then marked it to the pattern piece.

Cut the upper dart line and the line of the new dart (left line in the picture) and shift the pattern piece so that the dart at the armhole is removed and the side dart enlarged.
True the armhole line.
This is a quick alteration. I even finished my top in black silk tonight! With some changes in the finishing, more about that in the next post with pictures. As it’s black and it is already dark here, no good light any more to make pictures.
From muslin to finished top was only a short 2 hours.
Terrific recovery from your initial disappointment and plans to a successful new top...bravo! Thanks for reminding me about that alteration method. I was helping a friend do some fitting and this would have been easier for her to understand.
ReplyDeleteFunny, but I don't hate sticking downloaded patterns together. But that is also because I live in the Philippines where I have no choice as ready printed patterns are not available here. I actually find that using a glue stick instead of tape is much more effective as you can reposition the paper easily.
ReplyDeleteThank you for detailing the pattern changes you made. Your explanations are clear and very helpful. You have given me the courage to try the top, however, I do not wear sleeveless garments as my arms are way too thin.
ReplyDeleteMarie
You're not the only one who's had muslin fitting problems.
ReplyDeleteI had to print the Sorbetto pattern out twice, having used the wrong printer settings. After taping the pieces together (twice -- I didn't realize my printing mistake until it was too late), I made two or three muslins but couldn't get it to fit well. So I'm going to make a pattern inspired by it based on a previous pattern that fits me.
I like the idea that it doesn't require too much fabric and can be modified fairly easily.
I wish I could figure out how to combine those sheets on a computer and take them to a photocopy shop.
I had to shorten the dart, and raise or lower it, I forget which. The torso was cut a lot bigger than I am so many adjustments were needed.
ReplyDeleteThanks for showing that technique of marking the dart you pinched out. very useful those Threads techniques!
ReplyDeleteI made three of these (two with sleeves) and ended up lowering and shortening the darts as they did come too far toward the center. I also had to lower the armhole just a bit. Overall I found this pattern much more true to size than usual for me.
Thank you for your clear explanations. Truly empowering! Looking forward to seeing your completed garment.
ReplyDelete