I’ve had quite a productive weekend. I made one knit top that I’ll show you later when I have a picture of me wearing it.
Further I’m working on Vogue pattern 8689, a new pattern for a basic shirt.
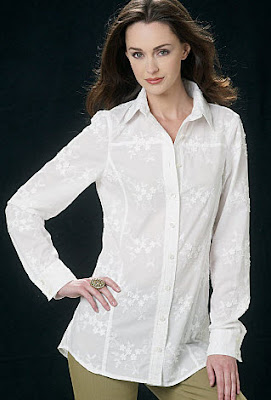
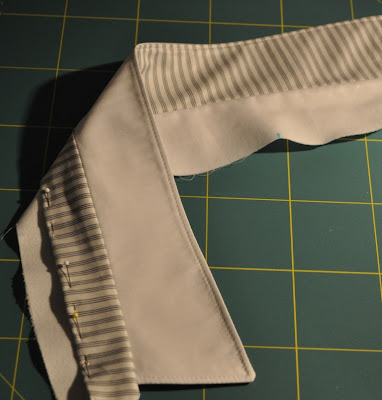
I learned to sew using Burda and Knip Mode patterns, without seam allowances. And till now, almost 40 years later, I'm still not used to working with patterns that have seam allowances. I miss the feeling for size, the curves and most of all: how the seams fit together. I've been sewing the collar and the sleeves already, and from the blue marks, that will fade away with water, you can see that I marked the seamline where the cuff has to meet the sleeve.

That was needed, because I used the method to attach a cuff as described by Sherry from the blog Pattern, Scissors ~ cloth. The cuff is not sewn to the sleeve first, but the sleeve is put into the cuff that is sewn together already and then topstitched. By the topstitching the cuff gets attached to the sleeve. Pretty neat method.
When cutting the pattern pieces, I wondered about the front part having a corner, but thought that that would be corrected when the seams were done. I find that patterns with seam allowances often have strange corners, that upon sewing the parts together turn out well. This time something strange is happening. Don't you think this is strange?

Of course I first checked the pattern pieces. I always trace my patterns, so I could have made a mistake there, but no, I used the correct pieces and traced them correctly too. Then I drew the actual seam lines on the pattern pieces and pinned them together. Same corner is showing.

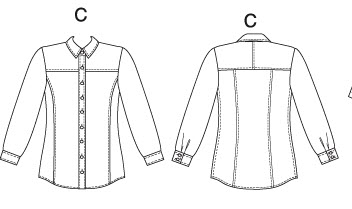
In the drawings of the instructions, a smooth line for the armhole is drawn. Don’t you hate it when you encounter something like this? It stopped me for the moment. I will continue later, and see what happens when inserting the sleeves. The pattern is so new that there are no reviews yet. I’m curious if someone else has found this to be a problem.

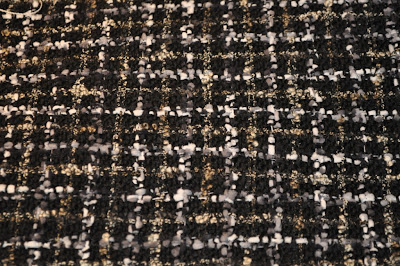
Parting shot: I couldn’t help myself, going to a shop to buy some sewing notions I needed, I fell for this bouclé fabric and it came home with me. I plan to make a short, simple jacket from it, Chanel style, but not with the elaborate original construction method.
Love your new fabric and I'm so jealous of your collar/band application. I have just got to find some time to practice those.
ReplyDeleteSo many shirts being made in blogland. Yours is looking good. Not sure about the square in the armhole though. I hope it fits together ok. I like the stripe contrast too. Subtle but interesting.
ReplyDeleteYour shiret looks so pretty. Shirts are the theme in sewing blogland. The boucle is gorgeous, your jacket will be stunning.
ReplyDeleteThanks for taking us through your shirt making process. My wardrobe lacks a good structured white shirt so I'm watching with interest.
ReplyDeleteNice cuff! I'm glad you liked the cuff method - I find it quicker, and easier to get neat corners!
ReplyDeleteThe front armhole does look weird - no sign of a square armhole on the tech drawing or photo! Maybe you could track the sleeve around the seam to get the right shape? Good luck!
Your shirt is coming along really nicely - thanks for giving us some interesting close-up details and a warning about the strange pattern drafting!
ReplyDeleteLooks great. I will have to try that technique.
ReplyDeleteWhat a great cuff treatment! I like your stripe fabric for the cuff/neckband facing. Very nice. since you trace your patterns, (so do I), I would (next time) just curve that square armsythe.
ReplyDeleteI love that shirt pattern. I'm making a very similar design that I built off my basic shirt block.
ReplyDeleteI've been applying cuffs like this for years now, having first seen the method on Kathleen Fasanella's blog. (http://www.fashion-incubator.com/archive/reverse_engineering_standard_work_pt7/)
If you turn under the same amount on your cuff as you use on the bottom edge of your sleeve, you can just match the raw edges when applying the cuff. There is no need to mark. For instance, I turn under 1/2 inch on the top cuff and use a 1/2 inch seam allowance on the bottom of the sleeve. It makes it very easy!
Your cuffs look great! When I run across weird pattern matches like that I just trim them to look like the pattern. But that's why my sewing looks like mine and yours is always perfect!
ReplyDelete